The top is made up of three slabs which meant there was only two joints to worry about but because these are wide slabs there wasn’t any room for sloppiness. If I’d tried to just clamp poor edge joints together on sections this large then the joint would be guaranteed to fail so I needed to take my time and get these right. I laid the top out and pulled the sections up tight together to identify where work was needed. One joint wasn’t too bad… the other shocking… I decided to start out on the hard one. I just happened to be using the perfect workbench for this job at the time; a big eight footer with a second sliding leg vice. Once I’d man handled the wood in to the vices I could get to work, of course I couldn’t just plane willy nilly and expect to come up trumps. As I worked I was checking for three things, that the edge was straight, square and free from twist. Once I was happy that I had each joining edge the best I could by eye I laid the top back out and pulled the joints up tight… they were almost there, just a few little gaps but barely a fag paper’s.

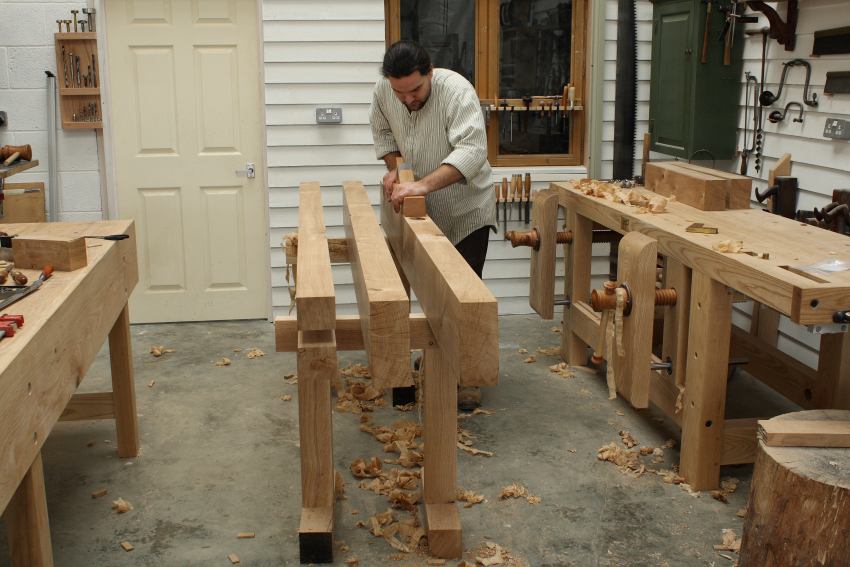
Rather than lugging each slab back to the workbench I tipped them on edge where they were and did the final fine tuning, checking constantly on my progress by pulling the joint together.
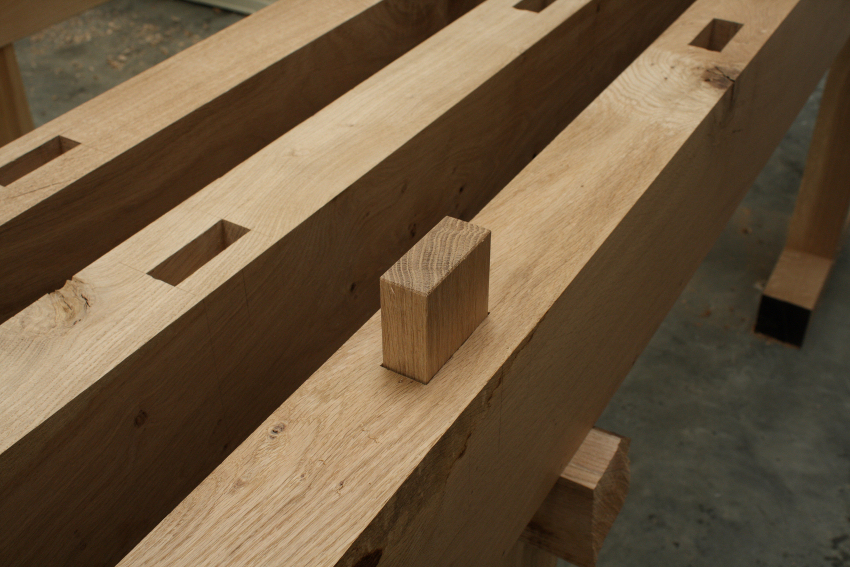
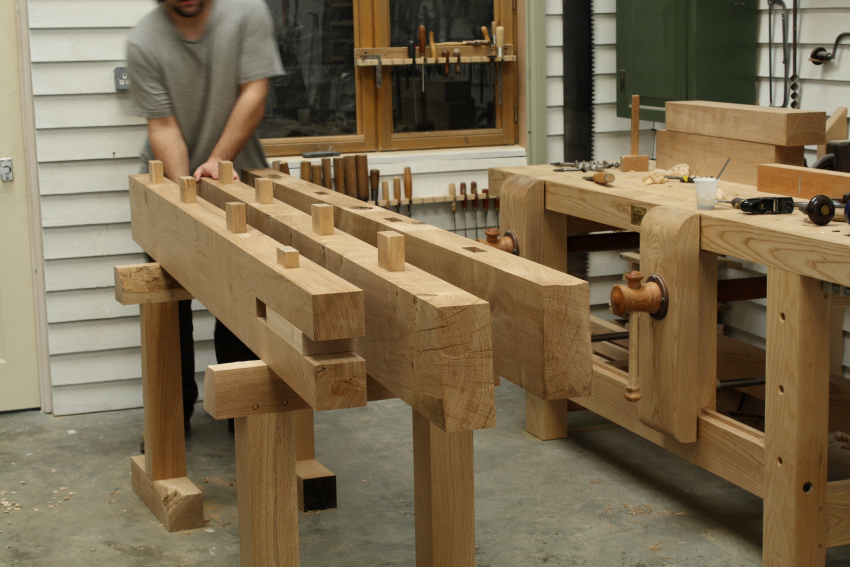
If you want your workbench to last forever then it makes sense not to rely solely on glue and instead try to ensure that every joint has a mechanical fixing as well. The top should be no exception and one of the main advantages of a slab based top is that there is plenty of opportunity to reinforce with massive pegged tenons. Four in each joint ought to do it. I made a start by marking the mortices out spacing them evenly by eye and then got to work with a brace and bit. There is no easy way of doing this so I bored out as much as possible and then cleared the edges with a chisel. A few sweaty hours later and I was ready to make some loose tenons, the quickest way was to rive them out of a billet of oak and plane them down to size leaving a nice tight fit.

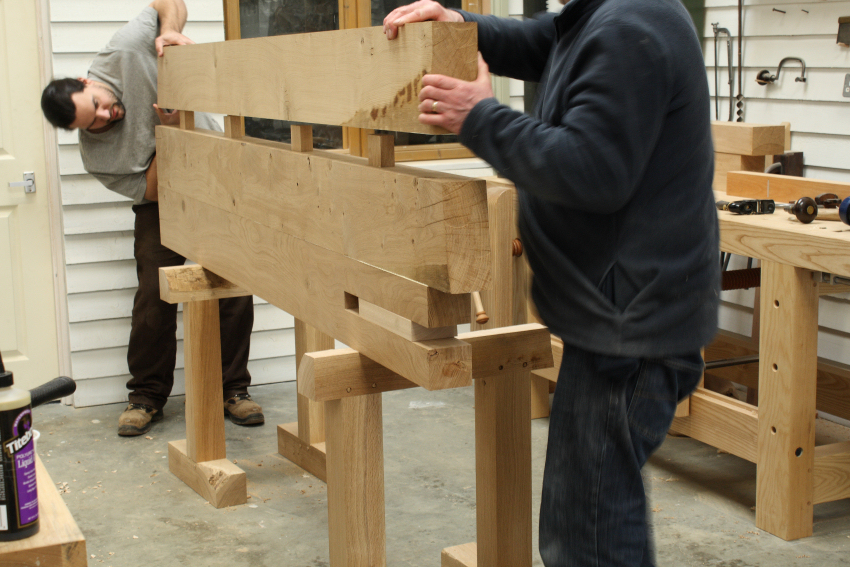
After giving everything one last check I was ready to glue the top up. I put plenty of glue in to all of the mortices and rolled it on to every edge of the top before knocking in the tenons and then stacking the slabs up – they were a pretty tight fit so having a lump hammer kicking about was recommended. I fitted plenty of clamps evenly along the length and after nipping them up nice and tight I left the glue to cure for 24 hours.
Read The Next Part Of The Build
![Simple Work Holding For Ploughing Grooves [Without a Tail Vice]](https://www.theenglishwoodworker.com/wp-content/uploads/2022/07/workholding-without-tail-vice-copy.jpg)
![Gluing Up A Workbench Leg [VIDEO]](https://www.theenglishwoodworker.com/wp-content/uploads/2022/06/gluing-up-a-workbench-leg-video.jpg)
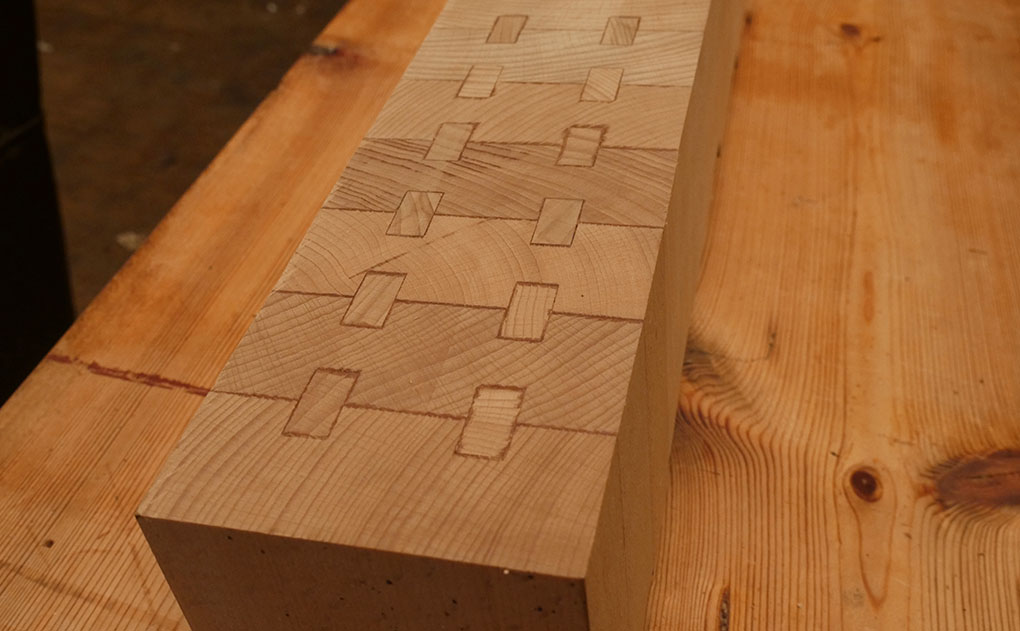

That is some glue up buddy, that top will last for ever. How thick is that top Richard ? It looks like it weighs a ton.
Thanks for the post, always nice to see.
Very Best
Ken 😉
Ken,
It definately feels like it weighs a bloody ton! The top’s around 4″ thick with each slab around 8″ wide and at this stage just shy of 8′ long. Wait until you see the next bench coming up…
Thanks, Richard
Great to see your attention to detail, Richard. Pegged loose tenons are one of my favourite joints but I’ve never tried any that big.
Cheers 😉
Paul
Paul,
Yea I also love ’em. With slabs this size the pegged tenons are in my opinion the best way forward, a few extra hours of work here will see this bench last a lot longer than any of us. It’s reassuring for me to use time tested methods like this, I’ve seen countless tables hundreds of years old and those top slabs are still held firm.
All the best, Richard
.
Fascinating. That really is a dreadnought of a bench top!
I made a similar bench, though a little shorter, about 20 years ago out of 4” x 2” Waney-edge Beech that I got from a yard in Reading. At that time, I glued the Beech top boards (five) edge on so that the top is 2” thick and has a 4″ x 4″ beam on the front with a row of square dog holes.
I still use that bench every day, though it’s quite battered now. House moves, repeated changes in humidity and wear and tear means that it’s ready for a re-fit.
This brings me to the one thing that stuck in my mind after I made the top: i.e. I would have assembled it with threaded metal rods or, using my current method of construction, draw-bore pegs. The reason is that the whole thing could be dismantled for a major re-fit every quarter century or so, therefore making the job easier to do when you are dealing with individual planks instead of a top that weighs a ton!
Anyway keep the posts coming. It’s a fascinating read.
All best from stormy Wales.
.
Howard,
Threaded bar certainly is an interesting subject, I know that some of the Shaker bench top are held together in a very similar way and they’ve all stood the test of time. P.s I checked out your own blog, some very nice work so I look forward to reading more.
Cheers, Richard.
.
Thanks for the kind words, Richard.
My bench is a ‘European’ style in that it has a shoulder and tail vice. The threaded rod is at the shoulder end to reinforce the short sections when under tension from the vice screw, though I did add another rod at the other end much later in an (unsuccessful) attempt to counter a little movement when I moved back to Wales. This is what prompted me to think that a top capable of being dismantled for the occasional re-fit would be an advantage. 20/20 hindsight.
Looking at your loose spline in the tenons, I was struck by how easy it would have been to exploit framing techniques and draw-peg them together.
Forgive me! This fits in with my current shift away from glues in weight bearing sections in this damp part of Wales.
But I’m following all this with anticipation.
All best
Howard
Hi Howard, Yes, like you I don’t like to rely on glue alone in load bearing situations and always try to expolit mechanical reinforcements when possible. I’m hoping to get the next post on shortly and you’ll see how I do reinforce these joints with tapered pegs. Of course I’ve used glue as well so this top’s pretty permanently fixed but with good sized pegs I expect you could hold it together with those alone for dismantling. Like you say they would definately need draw boring though.
Richard
Hi Richard… I just found your website, so I am catching up reading… WOW is that a bench. My question is how big are those mortises in the bottom? That is THE biggest mortising chisel I have ever seen. YOU are the man!!
Be well,
William
Frederick, Maryland
It’s V I S E
Or vice, for us here in England…