If you’re building a workbench then you’ll likely spend a lot of time pondering over which vices are going to suit you the best. There’s a lot of choice out there so it can be a big headache but whatever you opt for there’s one step that I definitely recommend you take.
Adding a suede lining to your vice jaw will add ‘bite’ and hold work more securely whilst the soft surface gives protection. It’s a simple change that can make a huge improvement and after spending all that time selecting and fitting it would be a shame to leave this out.
Suede, unlike shiny leather has a ‘grippy’ finish and if you can find the sort that is suede on both faces then it’ll be much easier to stick in place – contact adhesive is best for this and a nice old school one with the solvents in will be strongest (…I probably shouldn’t be saying that).
Double Suede
For a really stubborn grip I often line the mating surface as well as the vice jaw so that the work is sandwiched between two linings. If the front of your workbench is all in one plane like many traditional benches then you’ll want to consider one extra detail when doing this for your face vice or else it can have a negative effect.
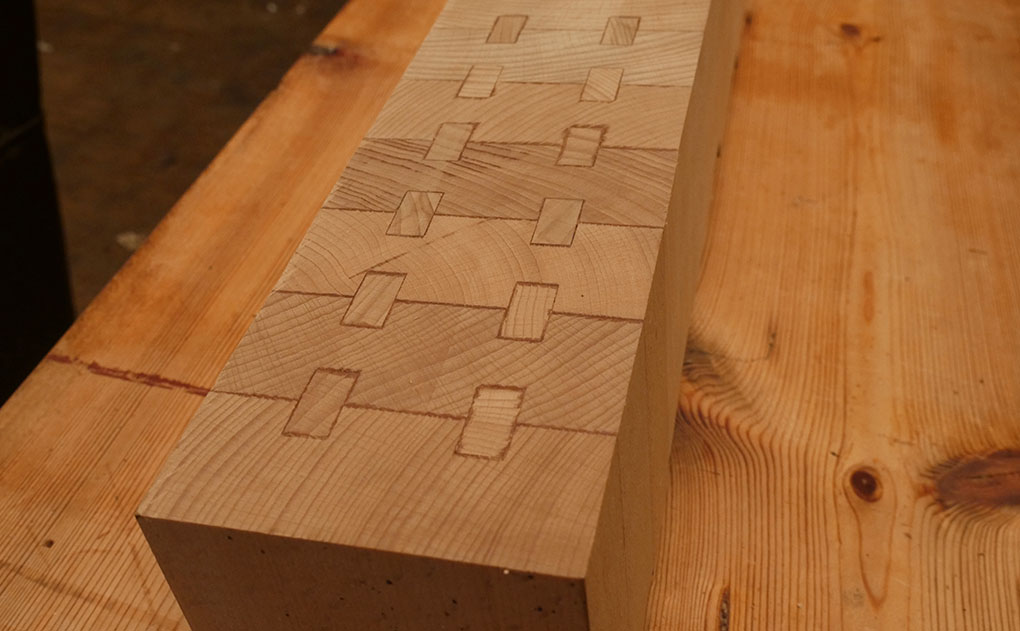
Sticking a second suede piece to the face of your bench top means it will jut out and cause a void behind any clamped work that hangs out of the jaw. Even a small void will mean the area is unsupported and when you come to cut or work the wood you will likely find it vibrates a little.
To gain the benefit of the second piece of suede I always recess it in to the top instead of sticking it straight on. It doesn’t need to go in far, perhaps just half its thickness so that when you clamp and compress the suede it becomes flush with the wood either side and work can be fully supported regardless of its length.
Paying attention to this extra detail can make all the difference and ensure you’ll get the most out of your vice.


![Simple Work Holding For Ploughing Grooves [Without a Tail Vice]](https://www.theenglishwoodworker.com/wp-content/uploads/2022/07/workholding-without-tail-vice-copy.jpg)
![Gluing Up A Workbench Leg [VIDEO]](https://www.theenglishwoodworker.com/wp-content/uploads/2022/06/gluing-up-a-workbench-leg-video.jpg)


Nice tips, Thank you. I’m just about to fit a vice and this will make a nice addition.
David, not bad timing then! I hope it works out well for you.
Thanks Richard, I need to find some Suede now 😉
Ken, check your inbox – just a little treat 😉
Many thanks Richard, nice one buddy 😉
Received it today Richard. Many thanks buddy 😉
Great tip, Richard. I dare say a piece of chamois leather would be easiest to find – they sell it in most car accessory shops for car washing.
That’s genius Paul, I often get asked where to get hold of small amounts and I can’t answer – I tend to buy the whole animal! I’m going pick some up next time I see some and give it a test.
Good idea Richard.
However, surely ordinary leather, fitted with the rough-side out would be just as effective, and somewhat cheaper? To help it stick to the vice maybe roughen up the smooth side first.
At the moment I am using offcuts of the old-style hardboard, with the rough side outwards. Trouble is, we can’t get that material so easily these days…
Cheers
JW
Hi John,
Ordinary leather would certainly do it if you can manage to get it to stick firm, I’ve found it’s quite resistant to the glue so some sort of roughing up like you say should help.
I know the hardboard you mean, I’ve never thought to use it as a vice lining do you find it effective?
All the best.
Good tip. Will try it. But what’s the best glue? Just ordinary pva?
Hi
Brilliant idea
I found this page by searching Leather grip for bench vice
Remembered years ago wooden vices often used leather surface for griping wood to help prevent broosing of the wood, well thats how are teacher explained it.
My vices are metal and when clamping gun parts etc using old rags or bits of wood can be hit and miss, Using rubber works well but doesnt last when in contact with oils.
Keep up the good work and thanks
Dave
I have used scrap leather taken from my daughters old boots, however you can take leather from handbags which are often more than capable of doing the job.
My method was unscrew grips from jaws of vice , punch 4 holes to line up with fixings alowing a nice well in centre of jaws looping over fixings of each jaw ready for glue. allow for when vice is fully open then repeat on opposit grip.
Doing it that way your gluing leather to leather which if using Evo stick impac glue or similar it will not part.
Apologies for yet another necrobump, but I wondered Richard whether you’ve an answer to Doug Nicholls’ question above about which glue to use? I’ve variously seen the suggestion of Copydex, 3M spray, and contact cement (I have Klebfest, a water resistant shoemaker’s glue).
Over the years, have you established a preference, both for working with (i.e. accomodation of slight imprecision when laying the leather), and for longevity of bond?
Thanks!
I used original Titebond wood clue to make make honing boards for honing my plane blades and chisels. It stuck the smooth side of the strop leather to an MDF board very well and after lots of honing, it hasn’t budged. Maybe the same will work if you remove the jaw liners from your vice and clamp the leather strips to them (with boards acting as cauls on top) over night.