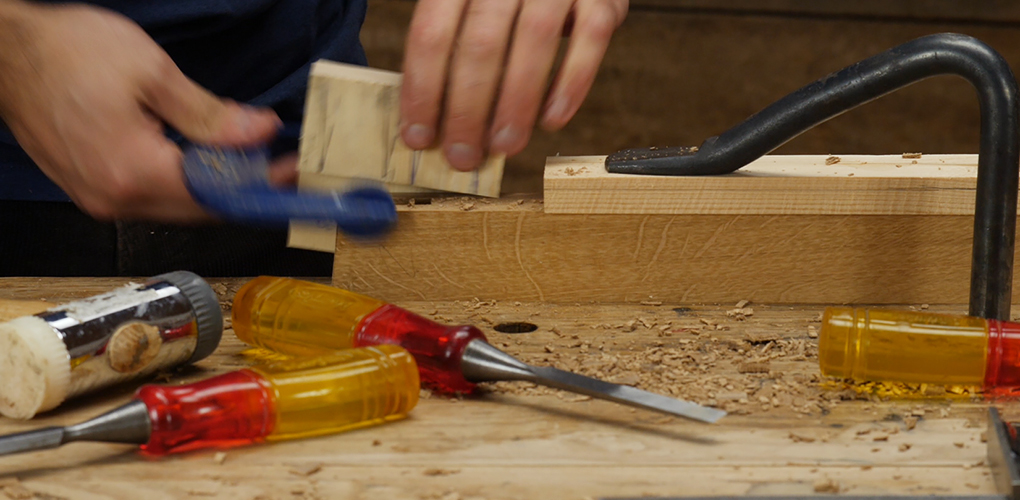
It’s a question that we’re asked weekly, and whilst I’m often babbling on about specific tools, I wanted to use this post to bring together a list of the essential stuff that will get a beginner going.
You probably know that I like to use minimal tools throughout my woodworking.
It’s an approach that I’ve always taken, so for anyone looking to get started with hand tools, I want to make something clear, a basic kit can be a preference not just a budget restraint.
For most projects these days, I’ll go start to finish with just a handful of tools, but I have many others that are simply sat unused.
There was a time when I’d surround myself like a collector, with saws hanging by the bench and moulding planes holding one another up along shelves, like books.
It was a humble collection of tattered hand me downs, but there was a tool for every job and most worked a treat.
Moving workshop can teach you a lot about how much sawdust you produce, even when you only use hand tools. It was mounded up on the tools, showing they’d been doing a great job at looking pretty and nowt more.
With only space for the essentials while the new workshop got set up, the rest went in to storage.
Several years on and it seems those essentials really are all you need.
I’ve built workbenches, beds, tables, big things and small. All at pace, and all with a pretty meagre set of hand tools.
I like a minimal kit because it’s simple.
There’s less to be familiar with, look after and store.
But I also believe that using less tools is a great way to learn.
When building a project for a video I’ve always been mindful to use only dead basic stuff.
I think it’s important for beginners to see that woodworking well by hand has nothing to do with having the best set up.
Watching stuff get built in this way should help a complete beginner get the gist of what they need pretty quickly. Or at least that’s the idea.
Buying stuff is a headache at the best of times, and then you try asking the good old internet for some help and it gets more confusing, more costly and best put off for another day.
Last week I tried to buy a microphone. I don’t know what’s good or care how they work, I just wanted to get something that would arrive, plug in and get on with the job.
I gave up before making a decision.
What I needed was for someone to understand my needs, and tell me what to get.
So that’s what I plan to do here, but with hand tools (not any of that techno shite).
The Essential ‘Getting Started’ Hand Tools
I’m keeping the list brief and prescriptive, because I feel that’s the clearest way to advise.
It’s a cost effect kit, that will get you building start to finish all by hand.
Your Bench Plane
A No.5 Jack with a couple of irons (one iron’s for coarse shavings, and the other for smooth).
By Jack plane I’m referring to standard bench plane with a length around 12″ – 15″.
Personally I love the old Stanley No.5, but you can also get them new from several brands, and there’s also the option of going wooden with the ECE Jack which is very cost effective.
It’s easy to dump a lot of money setting up with hand planes. Different sizes, different uses etc.
My suggestion is to get to know this one plane. It will teach you so much, and you may never need anything more

A Stanley No. 5 with a couple of irons. For details on creating & using cambered irons, see our ‘Get Sharp’ Video Series.
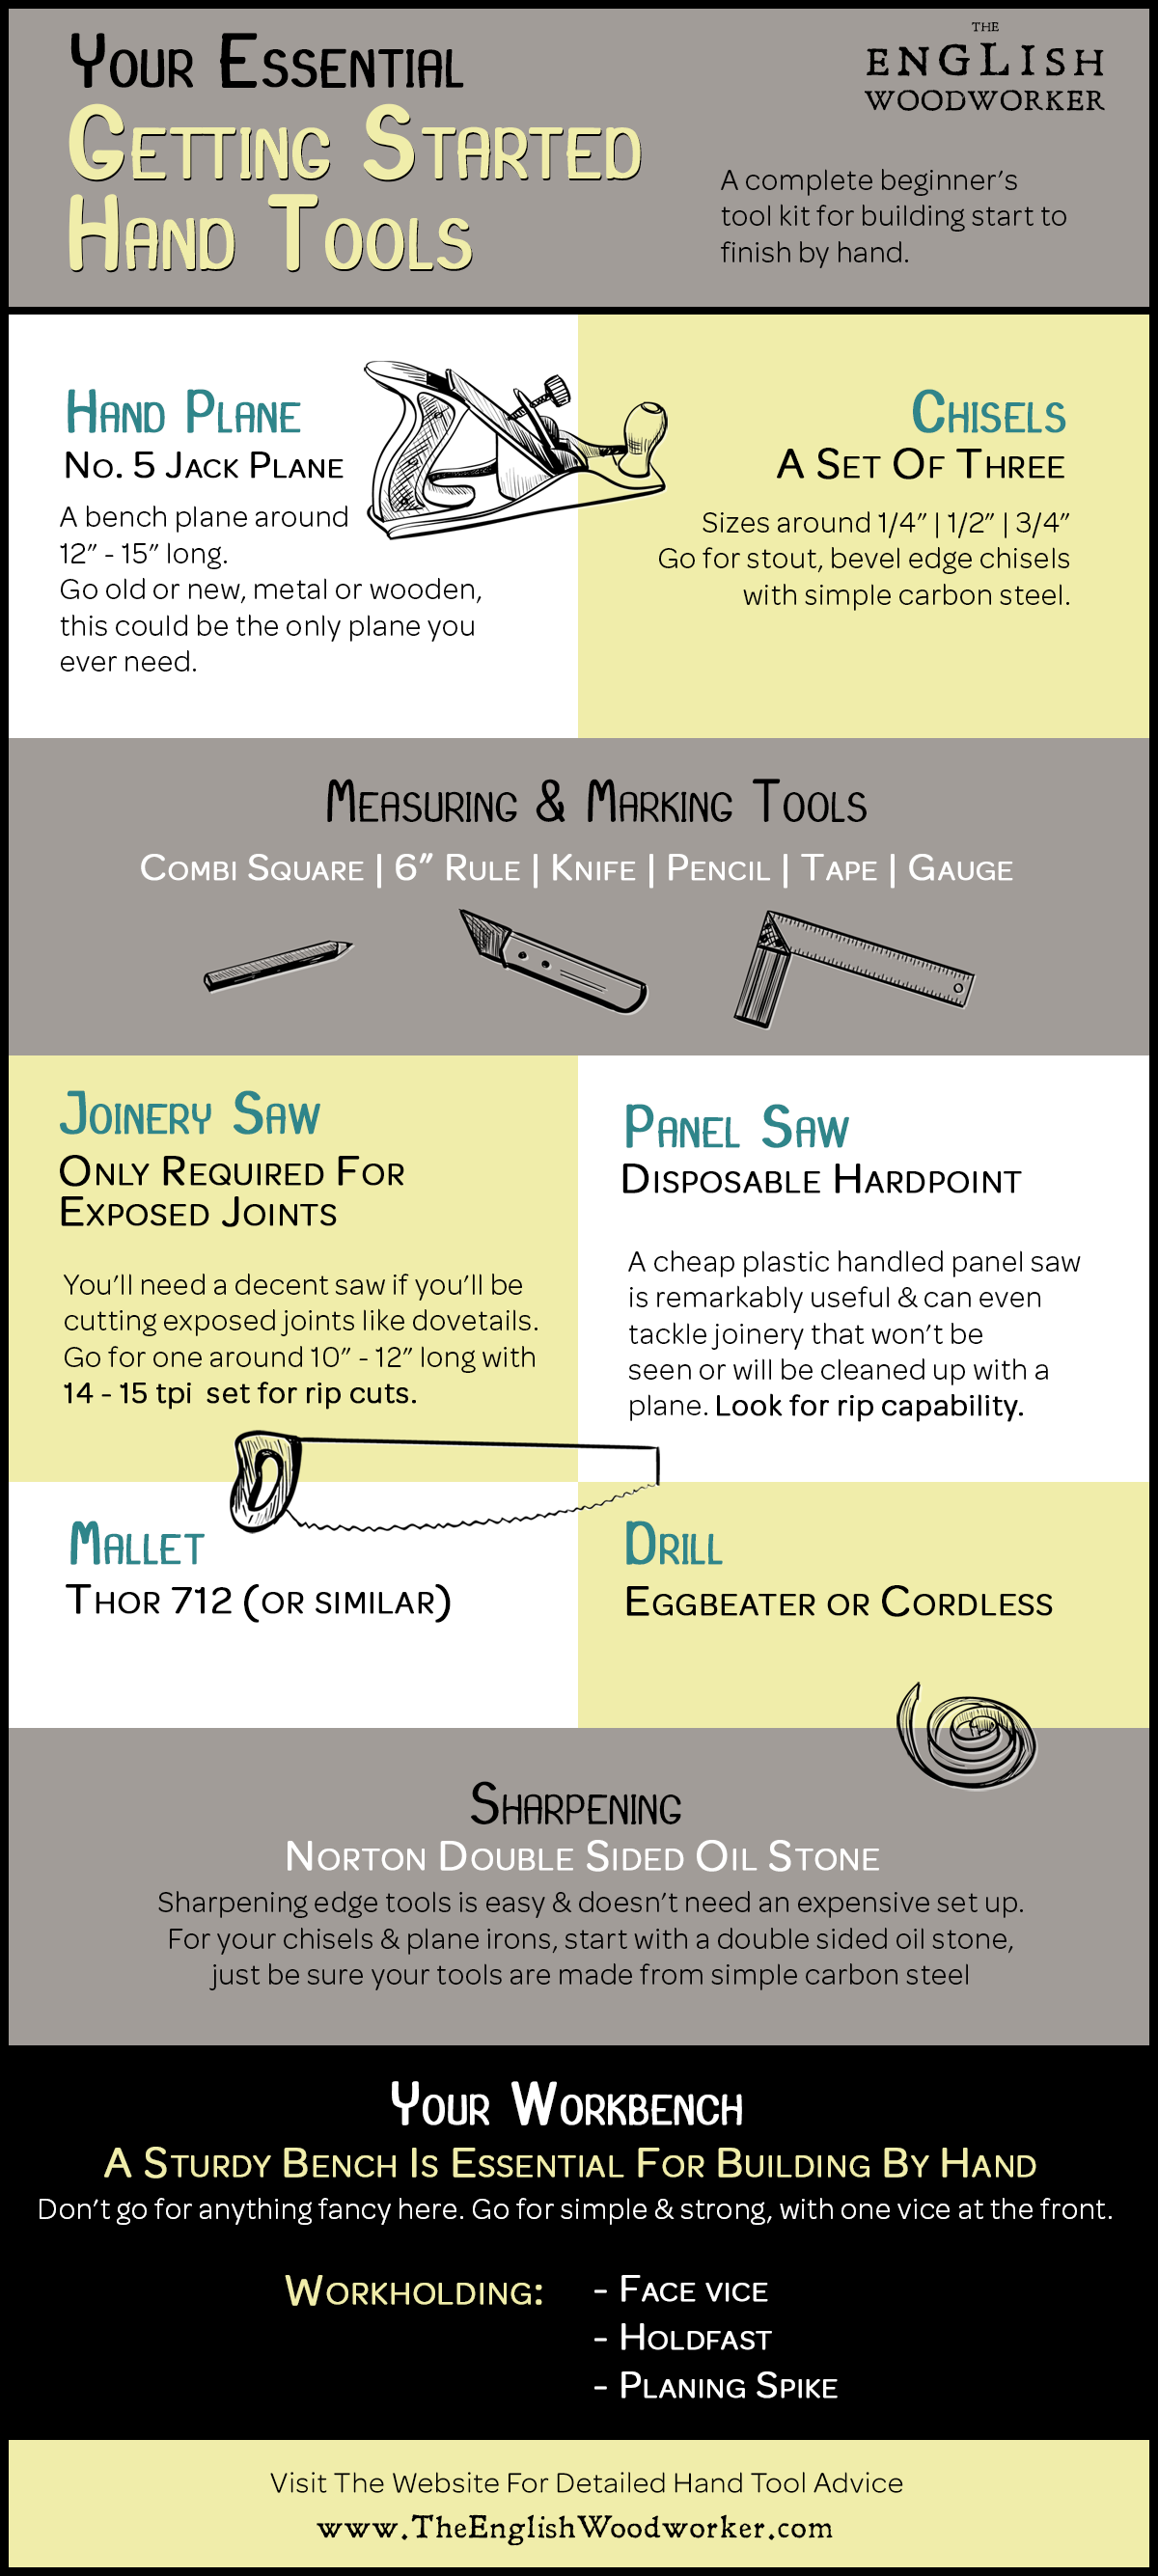
Your Set of Chisels
I’d say get a set of three chisels. One up to 1/4″ wide (6mm), something around 3/8″ up to 1/2″ (9 – 12mm) and one around 3/4″ (19mm) or a little over.
These are the sizes that will get you going, and you can add to that as you need to.
Go for bevel edge and fairly stout, then they’ll do ought.
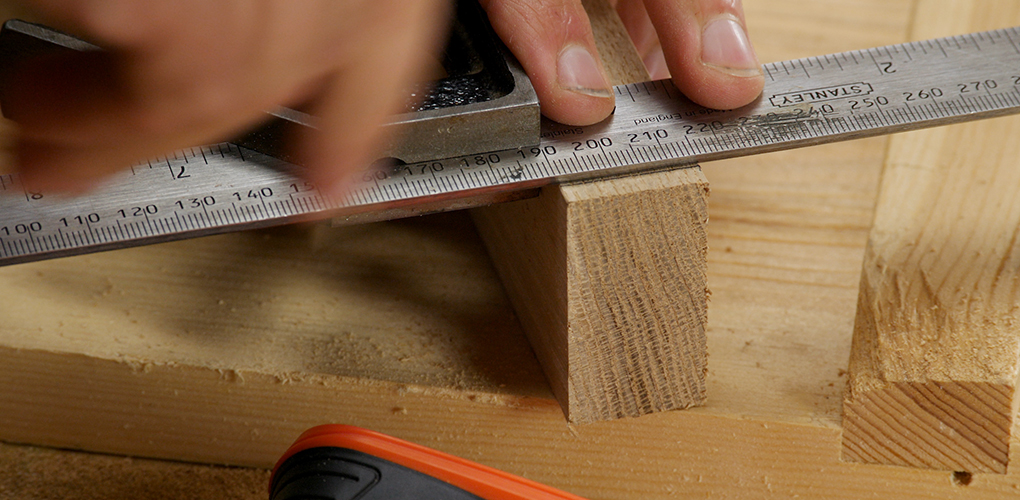
Measuring & Marking Tools
- You need a combi square.
- A little 6″ rule. (These are too cheap and handy not to buy, particularly for when you’re laying out joints and stuff like that.)
- Marking knife (Japanese knives are excellent),
- Pencil,
- Tape measure,
- Marking gauge.
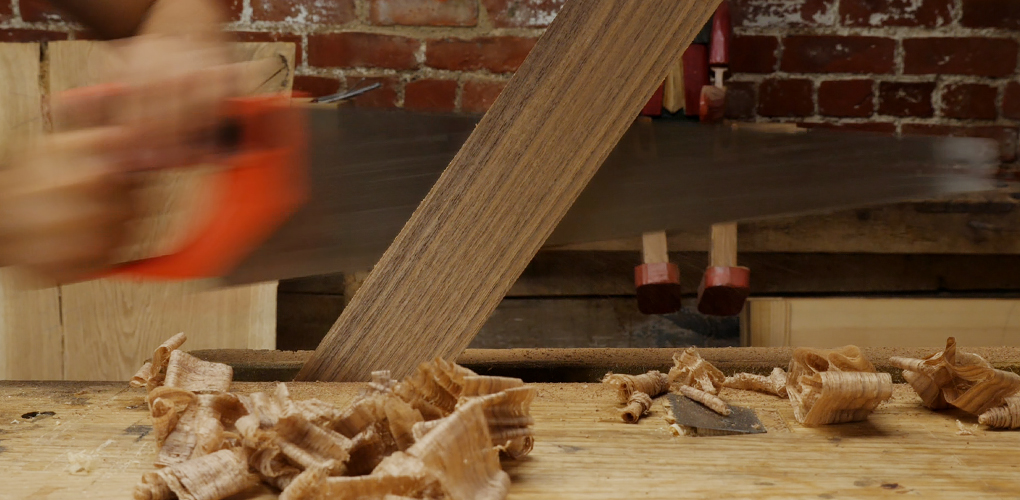
Hand Saws.
Your Joinery Saw
Saws are a funny one.
If you’re planning anything with lovely exposed joinery then you will have to spend on something decent.
For your first joinery saw, if you’re not sure which way to go, I’d look at a Japanese back saw. They’re quite cost effective, and disposable (so you won’t need to sharpen it). Don’t worry, they last ages.
If you’ve got a bit more money then consider something like a Veritas tenon saw.
Always go rip cut.
Your Panel Saw
You’ll want a cheap plastic handled hardpoint saw that’s got rip capability.
These are remarkably useful and can even tackle your joinery on cuts that either won’t be seen, or will be cleaned up with your plane.
You might need to try a few of these saws to find one that you like, but at least you won’t need to learn to sharpen a great big Diston.
A current favourite of mine is the orange handled Irwin, that you’ll find pretty much anywhere in the UK.
You’ll learn to sharpen those lovely Distons one day, but you don’t need to know how to sharpen a saw to get in to woodworking.
That’s the point here, it’s about learning the vital skills, with the vital tools, and the rest will come when needed.
For Hitting Stuff.
A Thor mallet (or alternative). I’ve written about my choice of mallet here.
Drilling
You’ll need some means to drill some holes, so that’ll be an eggbeater, or my favourite – a small cordless.
Sharpening
Despite the mystery, sharpening edge tools (that’s your plane irons and chisels) is easy, and doesn’t need much of a set up.
A double sided Norton oil stone would be my pick here.
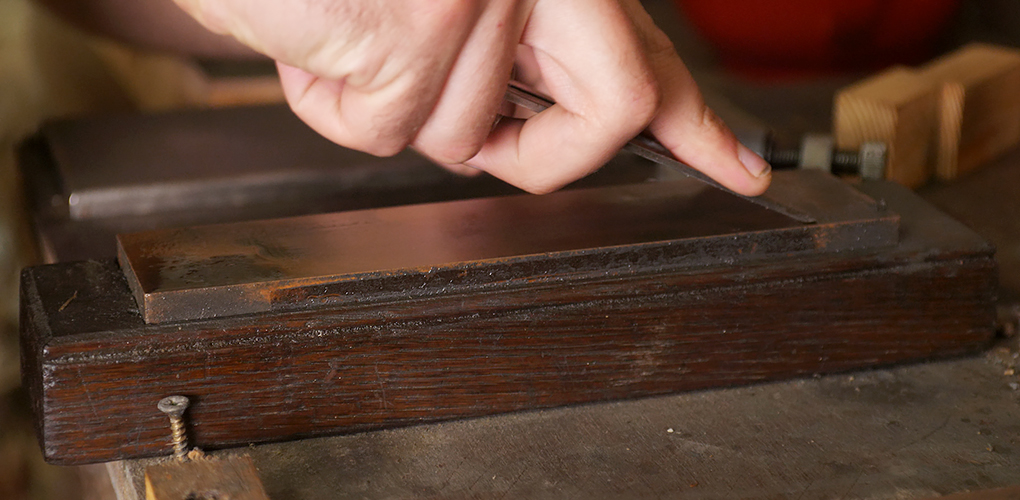
A double sided oil stone is all you need to get going with sharpening your edge tools, so long as they’re made from simple carbon steel. For a comprehensive guide on choosing stones and sharpening your hand tools, check out the ‘Get Sharp’ Video Series.
That’s Your Basic Kit Sorted.
On top of that there may be a flat screwdriver to adjust tools, and a 16oz – 18oz claw hammer will be useful if you plan on nailing, but these things can be had dead cheap and found locally.
With this tool kit you can build the vast majority of things, but don’t forget you’ll still need something to work off.
Your Workbench
All of these tools can only be used if you’ve got a good workbench. A sturdy bench is essential for woodworking by hand.
This doesn’t have to be expensive. Don’t follow the trend of building a glamourous workbench, It’s a trend that will set you back six months to a year while you build it.
And then you’ll be working on your Workmate anyway, because you daren’t use your beautiful bench.
Workholding
To use your workbench you’ll need a vice, and I’d complete it with a holdfast or some pinch dogs (or a cut nail or a bench knife). These are in the workholding category of tool and will be extremely useful.
Clamps
I’m not sure if these are a tool, but they’re very handy for fuss free glue ups.
A couple of G-clamps mid sized, maybe three to four F-clamps, between 2′ – 3′ long will get you going.
Clamps are a strange one, you’ll build them up gradually as you need them, then gradually stop using them as you learn how to not need them. Sounds odd but you’ll know what I mean one day.
I’ve got about nine hundred clamps all in storage (not exaggerating), and there’s about two and a half in the workshop at the minute.
The Extras That Are Nice To Have
A bevel – because you need to find some angles. These are cost effective, you’ve just got to find a decent one.
Router plane – This is a specialist plane, but one that’s extremely handy to have around. It’s the first of the luxury tools that I’d buy.
A coping saw – This will come in if you’re doing any curved work, although a chisel can often replace this.
What About Other Specialist Planes?
I wouldn’t look at anything other than the router plane.
Anything can be done with a chisel and you’ll get good very quickly by taking this approach.
Chopping a groove for a drawer base for example; a plow plane’s beautiful to have, but if you don’t have one you can chisel it, and it doesn’t take as long as you think.
A block plane? Yea they’re handy, but I haven’t touched one in three years.
And if someone says you need a No. 8, shove it up their arse.
Are These The Right Hand Tools For Your Project?
Of course it’s very hard to recommend the perfect starter set because your requirements alter depending on the projects you have in mind, but the above tools will allow you to build everything we’ve made so far in our various Video Series.
By the time you’ve got to grips with this basic set of hand tools, you’ll have learnt so much that you’ll know exactly what you need to buy next. If anything at all.
You’ll see a lot of these types of posts and videos on YouTube etc, so why should you be listening to this one?
I’ve made my living with these tools, nothing’s there for the sake of it, and nothing’s missing. If you don’t believe me, you only have to look at my bench top.
Our Video Build Series follow projects which are ideal for teaching you to build with this minimal hand tool kit. The Hall Table is a great build to get you going with a broad range of techniques – you can find full details here.
![Pt 2: Reamers & Tenon Cutters: Use & Applications [Shop bought vs Homemade]](https://www.theenglishwoodworker.com/wp-content/uploads/2026/06/355735B8-6EB7-48E7-8135-A45EC52D5F2F-400x250.jpeg)
![Pt 1: Understanding Chair Joinery: Tapered Round Joints | [ FREE 6 Part Video Course]](https://www.theenglishwoodworker.com/wp-content/uploads/2026/06/D4FD5406-5390-49FC-B939-255EFF4F845C-400x250.jpeg)
![Why and How to Blunt Your Chisels [VIDEO]](https://www.theenglishwoodworker.com/wp-content/uploads/2026/06/26269099-F519-415D-9196-5BF152B10DFF-400x250.jpeg)
![Which Saws Are Best For Ripping Thick Stuff? [Video]](https://www.theenglishwoodworker.com/wp-content/uploads/2022/12/what-hand-saw-is-best-for-thick-rip-cuts.jpg)

excellent post! noone can beat good advice from someone who makes a living at this. it’s struggle to commit to minimal tools but i can attest to getting too many too soon and not mastering them all. it can even slow down a project trying to fiddle with a new tool and create some waste. i’ve taken to the idea to make 6 projects with the same problem i like to solve with a specialty tool. then ask do i really need it.. for instance i want to incorporate more sliding dovetails. as per you sound advice you don’t need anything more than what you listed but i keep eyeing a dovetail planes both male and female. i just saying resist and build! learn efficiency with what i have and decide if its a roadblock to success or profitability
Thanks Joe, minimal tools are great both for learning and an accessible set up. Your 6 project problem solving is a great idea! It’ll definitely teach you a lot.
But if you have the specialist stuff to hand, or you can afford to give it a whirl, then go for it, there are certainly efficiencies to be had. Just never let not having a tool be the excuse!
Thank you for this, Richard, a very nice post!
I have often wondered what your essential tool kit would look like, and it is just as minimal as I assumed it would be. There are quite a few hand tool lists around and everyone seems to have a different opinion. Always nice to compare the differences and similarities, too.
On a sidenote, your Spoon rack series was one of my first encounters with hand tool woodworking and it was what got me hooked. I have to admit, for a complete beginner the array of tools you showed in the videos seemed a bit frightening, mostly the joinery planes. Took a while to realise that one does not need every one of them to begin with.
Hi Miikka,
I’m glad you brought the Spoon Rack up, as our first series I was really torn knowing what people would want to see – minimalist or all the options.
In the end we took a mixed approach, but I do wish I’d minimalised the tool kit when I think back to it.
I can imagine planning the first series was the hardest of them all. Glad you made the decision to start! If you are interested, here is what I think of the matter, as a complete beginner:
When I came across your blog I was preparing to get started and looking for pointers, and decided to buy your series. In my opinion the choice to show the options was a good one. The series presented a clear overview of hand tool woodworking and you made it look easy and impressive at the same time. That series gave me the confidence to pick up the plane and start woodworking instead of coming up with a long savings plans to outfit a machine-shop. Thus, it was more an inspirational series than a build-along for me. I decided that was the kind of woodworking I wanted to be doing and began practicing. When you minimalised your kit for the later series, the builds themselves became more accessible. I felt I could actually build the pieces with the tools I had available. As a whole, you have provided me with the confidence to get started and the basic skills to continue.
So, thank you for the great content, I really look forward to seeing more!
Thanks Miikka, sometimes when you’re on your own, talking to a bloody camera it’s easy to forget that people actually watch it!
It’s comments like this that remind me, thank you.
Perfect.
Great stuff, especially about not needing an expensive bench. My only addition to your toolkit would be a flat spokeshave, you can do a lot with it that it tedious with a no 5 plane or chisel.
I second the spokeshave if you’re doing curved work, it is a nice addition. I would also recommend a card scraper.
Thanks,
A spokeshave is certainly a good addition when you start to bring curves in to your projects.
I’ve never been one for card scrapers, though many people do love them, and they’re certainly cheap enough to add.
Thank you so much for putting this together. I’ve been deliberating for months on what to buy as a starter kit but have just been overwhelmed by all the options. This is finally going to help decide on what I need and actually get on making things!
Hi James, everything on the list will be of use for the rest of your woodworking life, so you’ll regret nothing, and you’ll be able to add to it as and when the jobs dictate,
Just buy the best you can afford, and job’s a good’un.
Great list, and nice to see the good old hardpoint saw on there, they last ages on actual wood. (And about five minutes on laminate flooring!)
With Stanley No.4 s available for around a tenner at every car boot you ever go to I question not having two of these rather than one and two irons set up for rough and smooth.
And the first luxury tool I’d buy – the first one I did buy – is a Coarse Diamond flat plate – boy does that make setting second hand chisels and plane irons up a whole lot faster. 80 odd quid for a decent one does feel like a lot of money to spend but it saves hours and hours, also around a tenner on a sharpening guide is money well spent.
Yeah I second the diamond plates, sharpening jig isn’t necessary for my needs but it did help me to get started. I just freehand everything now. My first plane was a no.4 my second plane was a no.4 converted to a scrub. Next was a spokeshave, dead handy to have.
Thanks, I absolutely love diamond plates for the rough stuff also, and it would certainly be the first update I make to the sharpening set up.
Even after you’ve tarted your tools up with it, they’re beasts for primary bevels.
A lot of people do favour the two plane set up, and could certainly be a good route if budget allows. This is very personal, but my No. 5 has become so attached to me, from using it as my only plane, that it almost talks to me now! If you laid a thousand No.5 s out I’d be able to pick out mine, that’s the connection you gain.
How do you do, Richard,
Speaking of rugged simplicity and hand tools kit – I’m very surprised to not see an axe in it! I still remember how I was amazed to see a board being split by an axe in the spoon rack premium video. Do you plan to make a blog post on this sort of topic (also because not everyone has access to premium videos)? Would be interesting to see what other coarse tools you use and when and why, and your thoughts around them. After all, the longer we stay at coarse stage the less time it will take to make something and the more efficient we are.
Thank you for knowledge. Big fan of your style of speech. Always pleasure to watch how you work.
Thanks Andrey,
Yes, we’re definitely going to start broadening up tools soon.
An axe is a remarkably efficient tool. I kind of don’t want to sound like a Nanny here, but a lot of the people that we teach are very new, and I became apprehensive about their hand-eye co-ordination when I’m recommending swinging an axe about!
The axe use will come back, I just want to make sure I’ve done a proper talk on safe technique first.
If people think sex and guns are dangerous, they haven’t used an axe!
Too true, I never realised how amazing an axe is to use till I got myself a carpenters axe that I keep as sharp as my chisels. But as you say it’s a fair old learning curve to not hurt yourself with one. I would love your thoughts on block heights for joinery work. I’m about to order a log, I was thinking of 33 inches high, 16″ diameter. I’m 5/10.
Hi Michael,
The block height’s going to be a personal thing, depending on what you use it for. Mine’s about knee height, which is on the low end, but I did use to do a tremendous amount of prepping straight from the tree. As you’re the same height as me, I’d say 33″ would be a tad on the high side. If you imagine you’ve got a longish piece of wood to work down the length, you want to be holding it almost vertical, rather than angled as it’s less likely to slip. The higher the working surface, the more angled it’s naturally going to become, hence why mine’s so low.
Sound advice thanks Richard.
24″ for the chopping block. all of my lumber comes from last years spring clean up. currently have Cherry, White oak, Ash, Hard & Soft Maple as Well as Sasafrass on hand there is also Birch in the woods but none of them have needed to come down yet. I keep two single bevel axes one light one Heavy(2-1/2 lb) which I use depends on how my Elbow feels. A Froe is also required. I think going from tree to board is harder than from board to furniture but it depends how much wind is in the tree. I don’t think I would of ever been able to build the required skills if I had to pay for the lumber though I guess I paid in labor. Air dried stuff is some much better to work with its worth it.
If I were to give someone new one piece of advice, it would be to buy their chisels new, not used. I have wasted more time and more money trying to save butchered chisels than I want to admit. There’s a good chance that the used chisel will be bellied in the back or pitted at the edge and it will take more than beginner skills to fix it. You may make things worse rather than better. Sure, learn to do this _some_ day, but maybe not as a beginner first thing. I’ve had similar problems with used planes, but it isn’t nearly as bad a problem for a joinery plane. If there are pits that lead to scratches, it may not matter for anything other than a final smoother. Also, a tiny back bevel may save the day on a plane, but you likely don’t want that on a chisel. So, I’m less fussed about planes and, if it all goes south, you can buy a new blade for smoothing work and use the old for rough work (all in the same plane). You can’t buy a new blade for a chisel. Well, you can, but it’s called buying a new chisel. I use 3/8″ a lot. 1/4, 3/8 to handle all the mortises and dovetails and either 3/4 or 1″ for paring shoulders and for fat parts of some dovetails. I probably learn towards the 1″ because there are times you want to reference off the blade to keep moving in a line, like for a housing. I think Lee Valley’s version of the Narex are excellent and mine came with flat backs that could go straight to polishing.
If you decide to get a tenon saw, it’s another place to consider buying new so that you know what sharp should feel like. In my opinion, aim for 12 tpi so that, when you decide to try to sharpen it, you won’t go bug eyed crazy. A 12 tpi rip tenon saw can cut all of your joinery.
Own one junk chisel, probably about 1″. This will keep you from doing what you oughtn’t to your good chisels. It can be used and can be nearly trash. It’s going to hit caulk on masonry, junk stuck to the floor, interior cuts on thin sheets of aluminum, and other such abuse. If the back and bevel sort of intersect on an extra coarse stone, it’s sharp. I’ve sharpened mine on the concrete back stoop. (Not so great for the concrete)
Hi Ed,
That secondary chisel was always known when I was training, as the ‘nail chisel’!
Definitely one to have to hand.
I completely stand by everything you’ve just said there, great points.
You can have new good chisels so cheap, why would you mess about?
Thank you for this post. I am about three years into wood working with handtools. I didn’t want to be a handtool collector. I wanted a good set of tools I could use. Since funds were tight and I wasn’t sure if I would keep doing this, I wanted to build my tools slowly. What you outlined is more or less what I ended up getting and it has indeed served me well. One can easily do a lot with all of these tools. At some point about two years into the hobby, I had a much better feel for what I wanted to make and what I may or may not need beyond this.
Thanks Joe,
Yep, once the basics are mastered, woodworking has its way of teaching you what you need.
Richard–how picky do you think we need to be with the combi square? Will an inexpensive one from the hardware store do, or would I do better (even as a beginner on a tight budget) to shell out for one of the more expensive, precision-machined ones?
David, cheap doesn’t mean rubbish, but it can. Don’t go for the Chinese brands you’ve never heard of, or those like Draper that they have bought out, and you should be OK. I like the Bahco ones because they are built a little more heavily and are very well made, and bright orange which stands out among the shavings 🙂
My old man likes the Bahco ones as well.
I’ve never spent much on a combi square, even the expensive ones can be out, I’d personally go to a shop that sells them, and pick through them while I’m there and test for square (draw the two opposite lines on a piece of wood).
Great article, Richard. May I suggest for the new, a video on making a batten. Along with the holdfast, the batten is an important piece of equipment for a bench. Like you, I’ve been using holdfasts and battens for years and it’s the first thing I show new people to woodworking.
For clamps, here in the US, Harbor Freight has good bar clamps but the hollow bar needs to be fitted with wood to make them sturdier. This is another great first project as it teaches measurement and fitting.
Thanks Mario, some excellent points.
I like the idea of reinforcing the clamps.
Just to say Paul Sellers has covered filling bar clamps with wood to make them sturdy.
On chisels, once a new comer learns to sharpen, Aldi sells a 4 chisel pack for about $20 US. They are blunt and the backs need to be flattened but once correctly sharpened, they hold their edge very well. These are my go to chisels for most work and they’re as sharp as a scalpel. My good chisels haven’t seen the light of day in over a year as the Aldi chisels work beautifully.
+1 for the Aldi chisels. They can be had here in the UK and in Europe, when they have them. That’s only about 2 or 3 times a year though . . .
I appreciate making furniture with hand tools
I love my woodworking
I have been doing it for longer than I can remember
But the world has changed
I am older and I want to make as much as I can
I use machines whenever I can however
The festool domino is the most amazing tool
I have ever owned
But I also have an ancillary hobby
I collect tools and
I do admit that I have more
Than I need
And I love to read all woodworking
Pls keep up your great work
THANK YOU
michael
Cheers, we all end up tool collectors eventually!
Very good post.
Too much information on the internet. What sounds like advice is often an advert or someone’s tool OCD .
I have collected a lot of stuff which I am whittling down. As I sell it off J buy a good replacement item and keep it simple.
It’s funny you mention that. I had another hobby I had been doing since the 1970s. Somewhere in the late 2000s I discovered forums. i was glad i had started that hobby before the internet. There was way too much info on the internet and I would have been frozen in my tracks.
Keeping that in mind, when I started woodworking as a hobby, I quickly discovered Paul Sellers and Chris Schwarz. At that point, I stopped looking for more info for fear of too much info. Only now have I started to really read what others think and do. Richard gives great adivce as well. i just didn’t find him three years ago.
Thanks,
Understanding how much conflicting info’s out there on the internet, just with woodworking, I have learnt how to sniff out the crap pretty quickly when looking in to other fields (such as buying microphones).
I do think it’s wise to find a limited number of good resources and understand where their strengths come from, and also understanding their weakness (we all have them!).
Nice post. Maybe a rasp or 2?
Yep, could be a nice cheap and easy addition when needed.
With only five years at this woodworking lark under my belt, I feel very hesitant to pass comment on that list but will nonetheless stick my neck out.
Two things which I took to instantly and now wouldn’t want to do without are an old-fashioned two foot, four fold ruler which gets used all the time (there’s nothing that comes close to it) and a 1 1/2″ butt chisel which gets used all the time for marking anything which needs to be chopped e.g. the side of a mortice. It also means fewer chops and therefore a bit more accuracy when cutting out a knife wall.
Thanks Andy,
I could certainly agree with you for the 2′ ruler, although mine’s a piece of stick!
And butt chisels are very nice as well, I can understand why you’d add that.
Is the frame or bow saw to weird/unavailable to put on the list? I’ve made three so far: one to be a large turning saw (about 2 feet blade), 1 for larger rougher work (also about 2 feet), 1 for smaller/joinery work (12 inches). All filed as rip saws and set of teeth greatly reduced.
I think a cordless drill is very sensible—useful to have even if you don’t do woodworking! I always seem to hit my knuckles or have other problems with egg beater drills.
I’m hoping to get one of my boys going on woodworking this summer and I think we need to get him his own tools, though a separate workbench might be too much for our space.
One of the advantages of a smaller kit of tools is it takes less space to store them! And, you have more $ for wood!
It is my understanding that frame saws are standard to a continental toolkit. Richard’s list of a hard-point handsaw, 10-12” backsaw, and coping saw is a very standard British/American toolkit, that preforms the same roles as the frame saws you detailed. All three are available in every hardware store in America and I assume in Britain, true hardware store back saws are now junk and to get something new that preforms as well an old Disston, like Richard stated, you have to upgrade to likes of Veritas and Lie-Nielsen.
Thanks, framesaws have become a huge part of my kit over the last year or so, as I’ve touched on in other posts. But for the absolute beginner coming to woodworking, I do feel it’s easier to learn and easier to buy if you take the other route.
But certainly, you could substitute and have the same functions.
Thanks for reminding me anyway, I’ve got loads to cover on framesaws.
And best of luck getting your son set up!
about three years ago I thought to make even only a cutting board I would need a complete set of machines, stationary and handmachines, plus of course a few handtools for “hybrid woodworking”, then I discovered Peter Sellers and most importantly Chris and The Anarchist’s Tool Chest, that was a revelation! So I find it absolutely awesome that you show us how to start with even less tools (especially the advice for saws is great, much cheaper to only get rip)!
However two questions:
1. Do you think maybe one or two more planes (jointer and Plough Plane) could make things significantly easier for a beginner (I have no doubt that you can joint long edges with a nr 5, but maybe not a beginner?)
2. What about flattening the stones? Or how long do these oilstones stay flat?
Hi Simon,
A plough plane is certainly going to start bringing you efficiencies, especially if you have loads of drawers to make for example, so again, let the projects you’re making dictate whether that could be worth while.
New ploughs are very expensive, so if you see an old one at a good price, then jump on it!
As for the jointer, I’ll only get mine out if I’m building full sized tables, so 6′ upwards in length.
So again the projects will dictate this, but bear in mind that a jointer’s only going to help you if it’s a good one – just because it’s long, doesn’t mean it’s straight. You could always build your own wooden jointer though – in the exact same methods we used in our wooden hand plane build.
For most edge jointing though, I do prefer to use a shorter plane, as I like to put slight cups along the length and I actually find this gives me more control.
A good update to your sharpening is definitely something like a coarse diamond stone which will do the rough stuff along with stone flattening. But I have to admit, I don’t believe I ever saw my old man flatten a stone. Oil stones do wear very slowly, and you can function of the curved stone as it wears.
thank you so much for answering all my questions I really appreciate it since I know it takes time to answer so many questions.
now I finally know what to recommend my friends when I try to convince them to give handtools a try (I currently am doing an apprenticeship in cabinetmaking (unfortunately mostly particle board) and said friends they do the same and often have no clue what can be achieved with handtools alone) because up until now, I never knew what to recommend for sharpening as my setup is great but very expensive. And I guess if I recommend to get two stones instead of a combination stone, one can keep one side flat for flattening the backs of new chisels, and add a strop with some polishing compound I really can’t think of anything else one would need for a long time!
Plow planes are great opens up options. made my first one for $4 dollars for a 3/8 wide pry bar for the Iron the rest was scraps of oak. Dis cost about 8 hours of shop time which could be two weeks worth depending on work an kids. I say first but there is probably a couple almost worked versions that got cut up into marking gauges.
But I really like my #08!!!
I am keeping my number 8 as well. Love it.
Ha, I love mine also, though these days I rarely use it,
For very many years (since the early 70’s) I built furniture, that I still have and use, with a Stanley No4 as my one and only plane – and only one blade for it. I still have, and use, that same plane. I now have other planes, but the first one is still my ‘go to’ plane. I have just given away my set of chisels, to my son, as I have collected a few old wooden handled ones which I now prefer, but those old blue plastic Marples set did me well for about 25 years.
Good post Richard, I can’t fault it.
Thanks Ian,
I know those blue handled chisels well!
Richard, would you write something similar about essential and minimal machines set, please? I know you have dumped them all except a bandsaw, so it would be interesting to know how would you go about efficiently processing rough lumber with just a bandsaw.
You can process your lumber with hand tools. You do not need any machines if you want to work by hand. No machines are essential and a minimal machines set would be to have none.
Richard wrote a post about machines in the hand tool shoo a while back: https://www.theenglishwoodworker.com/machines-in-the-hand-tool-workshop/
He suggests that a bandsaw and a small planer-thicknesser are the most useful machines.
Thanks,
I came to woodworking with just hand tools and run for many years like that.
It was only when my workbench business grew out of control that I had to incorporate the machines.
So my advice for machines is fairly limited when it comes to furniture making, but as Miikka says, the bandsaw and the planer are probably the two that are going to help you out the most.
I still believe I can out plane a planer, at least in context, but a bandsaw is where you’re really going to gain efficiencies, because hand sawing is very inefficient.
It’s a good list, Richard, objective and with clear justifications.
Good list overall.
I’d probably prioritize a couple of clamps in place of the holdfast. and planing stop. Quick clamps were very useful for me early, although they have some major drawbacks. deep-throated F-style are very nice, but quite a bit more expenisive (as are k-body clamps).
Battens and wedges are useful skills to have when the tools are at a minimum. (and still useful even after)
Matt
This is great!
I saw the same kind of “basic” recommendation once by a well-known Youtuber, and what he showed was: a full set of Lie-Nielsen chisels, two Bad Axe saws, a Lie Nielsen plane, etc. His way, the “basic” kit would have been in the neighbourhood of 1500 Euros/USD, which will scare away every beginning woodworker.
Thanks for picking the down-to-earth stuff!
Thanks Christoph,
I love the posh stuff, but unfortunately I really only find it’s good at the refining end of the build. I find the more cost effective stuff to be far more beneficial for the rest, I particularly dislike modern hard steels for example.
Dear Richard , thanks for the valuable info! I wish I knew these things 1 year earlier, before I spent my money on maschines. 😂 Your posts are rousing, and encouraging me to choose woodworking as my next prfession. Hope, I will reach the level one day , to do it for a living 🙂 . Please, keep posting, I promise I keep learning!
Thanks again,
Laszlo (from Hungary)
Thank you ever so much, it means an awful lot to know you’re learning.
On an unrelated note…
For sale:
1 x Festool Domino
1 x Festool orbital Sander
2 x Festool Track Saw
1 x Impact drill …………..
Great post!
A lot of your good advice here.
It seems like ages ago that I watched your video on planes. It was when you noted that the no.5 is a better jack than the no.4 because of the longer front end that things began clicking for me… that was also the moment I realised you truly knew beginners and what their needs might be. (And btw I love my no.5 – it’s just perfect.)
I also got myself an orange saw and boy can that do effortless cross-cuts. 🙂
Keep it up!
Regards,
Phil (a Kiwi in Norway)
Thanks Phil, all a man needs; a No 5 and an orange saw!
The Stanley No 5 is the world’s finest plane.
Thanks for the link to the Thor website – great to see a British manufacturing company still going strong!
I noticed that they do go heavier than the one you have – the 12-714N is 760g (26 oz) and the 12-716N is 1230g (2 lb 10 oz). Those hammers come with two white nylon faces, but you can get the softer (or harder) faces for them as well.
Thanks Paul,
I hadn’t spotted they do a bigger one, I’ll have to get that ordered.
I’ll dig a 2″ deep mortice in three whacks with that!
I agree, that’s a nice and easy set up to start with. I’d say a block plane it’s handy for small areas, and touch ups. A no.5 is excellent but a bit heavy and tiring sometimes. I find that a nice rabbet block plane (shoulder + block) with two irons with different sharpening angles it’s essential to me. One fine flat rasp and a medium flat file would complete my set.
Well thought out, some nice additions.
I am really glad that Richard mentioned the ECE wood plane in this article. Although I have purchased more used planes then necessary I really only use my old Stanley # 5 and my ECE which is probably a smoother but I bought it about 20 years ago so I am no longer sure and it is not marked.
The Stanley is my workhorse for the rough stuff but it is heavy and at 70 it wears me out quickly. The ECE is significantly lighter and was a headache learning how to properly set the blade but I did learn and I use it more and more. I now find setting the blade with a small hammer much quicker and efficient then spinning that dial on the Stanley.
At some point I am going to make a wood Jack plane based on Richard’s great course then I will retire that heavy metal Stanley.
Thanks David,
I absolutely love ECE and I think it’s a shame they don’t get the praise they deserve.
Richard,
With regard to your comment on the No8 plane, I think from a health and safety perspective it’s worth recommending the liberal application of camelia oil first.
Or maybe 3 in 1……..
Ha ha!
Lol, and make sure you knock back the corners on the iron, we’re not barbarians…
Other than the panel saw, all my kit fits into a 50x33x17cm wooden wine box. After years of relying on power tools for everything, I’ve found this minimalist approach very refreshing. Asking myself ‘will it fit in the box?’ helps me to curb ‘add to basket’ tendencies. My only additions to your list are a Stanley No. 18 block plane, a Lie Nielsen dowel plate and a small engineers set square, all non-essential but they do get used.
My Stanley 51/2 was in a bit of a state when I got it and refurbing it took a bit of time and cash. Now it works a treat and looks like new. I’m nearly through the bench build and have spend hours using it – it really is a workhorse piece of kit. I did some final cleaning up of some oak legs the other day and I can’t really see how a smaller plain would do a better job.
My chisels are thee old bevel edged Marples Shatterproofs plus an extra 1/2″ former that I use for mortices. I had one or two German chisels once that were supposed to be carbon steel – they were rock hard compared to these.
I’ve also added a diamond flattening plate which was a pricey but worthwhile investment. I think this is the single best thing I have learnt from this website – getting tools sharp without the fuss. It used to be such a performance with water stones.
My panel saw is a 25 quid course toothed Bahco that can be filed. Haven’t tried tried yet but I’m hoping that I won’t need to throw it away. My Pax has also stayed sharp so far but it won’t be long before I need to think about saw sharpening. Have you got any plans to do something on this?
Someone on here made the point that it took them a few years before they got a clear idea about what they wanted to make. I can relate to that. I’m starting to think that I’d like to do a cabinet type build so maybe a plough plane would help with that. There are plenty of old Stanley’s knocking around on Ebay. On the other hand, I’m in no hurry to buy anything else – I feel much more inclined now to make do and explore the limitations of tools that I’ve got.
Thanks Paul,
The saw sharpening is a definite yes, we’ll be covering that at some point. I’m just trying to process the most digestible method for teaching.
I actually have a dowel plate that I use quite a lot, so I’m with you there. The only reason it didn’t make it to the list, is because they can be pricy, and for years I just used a washer, or just whittled them.
I don’t think anyone regrets the diamond plates!
Like yourself, I get great satisfaction from working with this small kit. Similar to your wine box, I’ve got this old ‘sausage box’ that I can fit everything in, if I’m out the job site or such. It’s a lovely feeling to know that with just this small box of tools, I can pay all my bills and eat. I just wish I could get the rest of my life so minimal!
So much for not getting a #8 plane. I acquired a Stanley Bedrock608 at a froufrou antique store for $65. The owner did not know really what she had and just wanted to get this tool out of her shop. For $65, I had to take it off of her hands.
That’s a very good buy!
A very timely post. I have a nice collection of premium hand tools that I have been selling off with the aim of a minimalist yet highly functional kit.
As someone who finds hand planing a challenge the minimalist approach seems like the best way to truly learn a tools quirks and develop the skill required. So the Veritas BU planes are going along with the Tormek required to sharpen those gargantuan irons and a diamond plate and oil stone are on the way to get my old Stanley no 5 humming. I never found a sharpening routine that didn’t look a ball ache to keep the BU planes working well and being a stick thin wimp the weight of the buggers for anything more than controlled smoothing shavings knackered me out.
Last weekend I dug the timber for my English Workbench build out of the loft, it is awfully twisted, but I hope to make some headway this bank holiday.
Ha, don’t worry about the twist – there’s nothing a nail won’t bend!
If you really do want to get good, then I do believe that minimal is the way to go. You’ll make new methods and techniques up to solve problems rather than blaming, setting up, finding new tools.
I really love the solidness of the Veritas planes, they are genuinely good planes, but they’re not prepping tools.
I would also suggest a Japanese Hand Saw. These can be very helpful when making flush cuts.
Thank you for the visual guide and the detailed write up, I like your sensible approach to buying only the basics and growing from there. I also believe this approach leaves room for each person develop their own woodworking style.
Thanks Diogo,
I think when you try to learn everything at once it all goes pear shaped, when you take the time to learn the basics, you know what you need to learn next.
I must admit after 44 years in my joinery/ cabinet making shop I have amassed a conservative but all used range of the best I could buy at the time approach. It’s paid off really my daily set of chisels (black handled Stanley’s ) bought in 1978 will just see me to retirement and beyond albeit a little shorter now than when new.
Whilst I agree with everything you say there has to be a but 😀 and here it comes, after promising myself I’d have the bench of my dreams since my apprenticeship 42 years ago I finally two years ago built a three quarter ton steamed beech monster with all the bells and whistles. If only I’d had it years ago to me it’s the most important tool in my workshop now ! Solid, heavy, side and head vice, dog holes everywhere, sliding deadman the lot and yes very very pretty. But built to be used as a bench and with some visiting clients a showpiece! But more than anything because I could
I’ve noticed a diminishing-returns law of hand planes. No matter how many I buy, the #5 still gets used 10x as much as all the others put together.
Another thing I noticed was that – in the early days – a sharpening jig made my time go a lot further. I sharpen freehand now but if I had tried that from the start I would have been very frustrated.
New to your site RIchard, and very much enjoying your simple and no-nonsense approach! I’m a completely novice woodworker, just looking to get a few basic tools together so this article was very hepful, thanks. Do you have a link for a new Stanley No 5 plane or should I be buying an old one off eBay?
I read a Paul Sellers comment that said the modern Stanley stuff is a load of junk and best to look for 1970s and older. If it needs refurbishing, how easy is that to do? Have to admit I wouldn’t know where to start to be honest!
I know this is an older post but once again want to jump in here. I recently followed your example and built 2 frame saws – I was dead chuffed because I processed the 8’ board with 2 hand saws and 1 plane. The entire build was only the essentials and I didn’t feel like I was missing any thing not having the place littered with tools. I started this exactly because I didn’t want to go the machine route – not only for costs of one years wages but also we have no space to set up a full shop in miniature. Never been happier and it helps to have people like Richard and Helen leading by example. Thanks.
I wish I read this article earlier. My workshop is very small (a 3×3 m cellar), so I got into hand tool woodworking. I guess I became a sort of a tool fetishist, and I really like vintage tools, so now I have a lot of nice old tools, many of those waiting for restoration, which distracts from proceeding with actual projects. Although I do like caring for tools, having too many in the backlog is not something I would recommend. My advice for fellow tool fetishists? Get a minimal set, start making projects. Bought a vintage tool or even a lot of such tools? Rehab them, start using them. Only then start hunting eBay for more. Keep track of which tools you thought would be nice to have, but that you’re actually not using, and sell them.