Follow Step-by-Step with our French Workbench Video Build
This Series Is Now Complete!
The series can be purchased by Clicking Here
If you’re already a Member then you may need to Login first
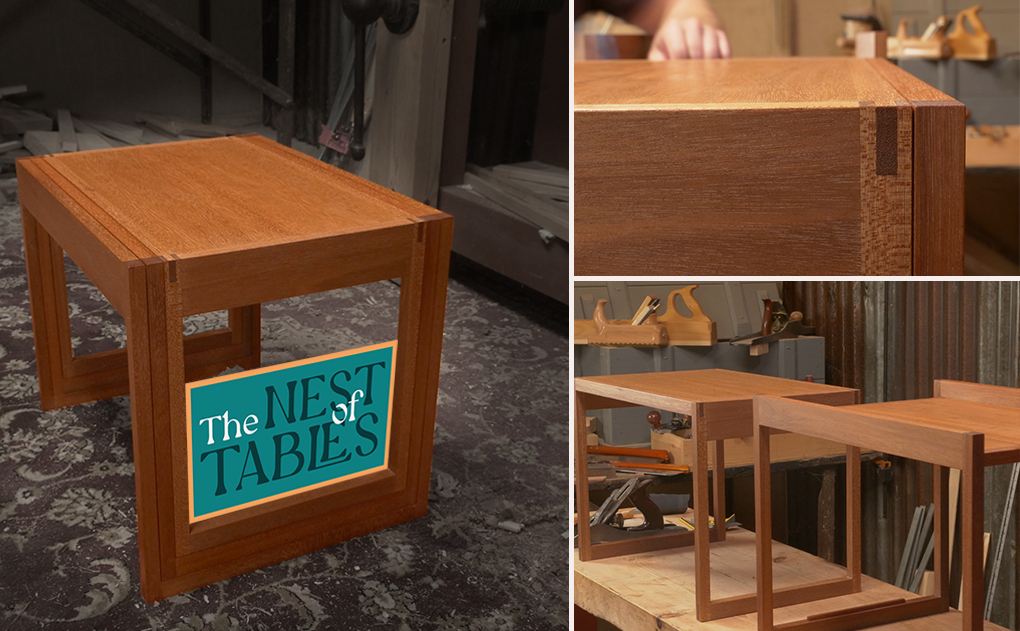
The Bench Design
The French workbench is simple and strong – just how a bench should be.
This build is based on a typical, traditional design which is built to last.
We’re joining the top from slabs and using draw bored mortice and tenons for the base.
Dimensions:
The design is easily scalable and will comfortably work for a bench from 5′ up to 12′ long.

What You’ll Need
A basic set of hand tools is all that’s needed to knock this thing up.
I’ve cobbled mine together from some old joists from a collapsed roof and other odds and sods I had to hand. Any timber species can be used.
We’ll be posting further details on both the tool kit and cutting list for the bench so check back HERE for updates.
If there’s anything specific you’d like to know feel free to pop your question below and we’ll make sure it’s covered.

Work Holding
Build your own leg vice and planing stop.
That huge vice screw is something special, but this leg vice build is easy to follow with any standard metal or wooden screw. We include the steps for installing a cross to keep the jaw parallel in use, and there’s plans for making your own cross so you can add the same.
A planing stop and handful of dog holes complete what is for me, a perfect work holding set up for hand tool woodworking.
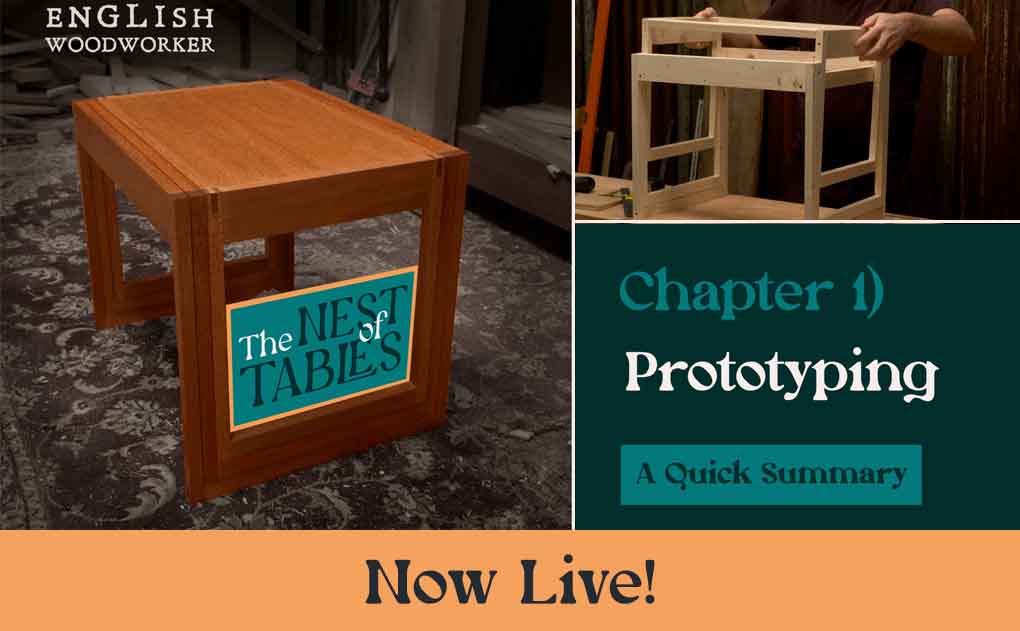
 The Video Series
We look set to bring the full build out through seven video chapters.
Chapter One will be live on Thursday 16th May.
Followed by a new video each week to stream and/or download.
A cutting list and full PDF plans are included.
The full series inc. PDF plans is now available
Price £35.00 (approx. $44.00)
You can purchase this series here: Buy Now
or Login First if you’re already a member.
For further details about this series take a look HERE
Not familiar with our Videos?
We make online courses that provide tuition on hand tool woodworking.
The detailed videos can be both streamed and downloaded.
As a professional hand tool woodworker, we aim to get you feeling inspired to build, and equipped with the knowledge to tackle projects entirely by hand.
View our full Collection of Video Series HERE
Or sign up to our Free Plane Build Mini Series HERE
![Simple Work Holding For Ploughing Grooves [Without a Tail Vice]](https://www.theenglishwoodworker.com/wp-content/uploads/2022/07/workholding-without-tail-vice-copy.jpg)
![Gluing Up A Workbench Leg [VIDEO]](https://www.theenglishwoodworker.com/wp-content/uploads/2022/06/gluing-up-a-workbench-leg-video.jpg)

That’s great news. I just purchased the English workbench video last week (love it) and was about to buy lumber. I know there are many opinions in this, but is there any general guidance you’re willing to share on how a new woodworker like myself could decide between the two? Many thanks.
If I may offer an opinion– I built Richard’s English Workbench for these reasons:
— Lighter weight, but very strong and rigid
— Front apron
— Face vice
I’ve looked at many workbench designs, and the English Workbench fits my needs. I use the front apron a lot. I prefer a face vice to a leg vice. (No tail vise for me.) I also use a Moxon vise, which is held in place by a pair of holdfasts. The principle that helped me decide is what kind of things do I build, and which bench holds my work the way I want it to?
I expect Richard’s French bench design will be as superior as his English bench design.
Great points to consider and good advice. Thanks, Carla!
OTOH (there is always another hand!) I would be OK with a French-style bench. Use a sliding deadman (who comes up with these names??) in place of a front apron. You can use F clamps and put a bottom shelf on a French bench, neither of which are very useful on an English bench.
As a classic overthinker, I have learned to just do stuff. When you know how to make things, you can also un-make them, and repurpose the materials into something else. Or sell or gift them. A lot of people on woodworking forums talk about having Forever Things: a forever table saw to pass down to heirs, a lifetime workbench, heirloom hand planes, etc….me, I know my needs and whims are always changing, and I don’t have the room or desire to hoard collections of Forever Things. If something you build doesn’t work out, modify it or build something else. That’s the fun of knowing how.
Hello Andy,
Let me offer you my advice for what its worth. I had no real workbench and spent most of last Year analyzing and overanalyzing all the various options and plans out there. I fell in love with the looks of all the “show roubos” that most people are scared to get a scratch on. But I needed something I could build with minimal hand tools, and it came down to the English Workbench, another one from another famous woodworker from UK, and a knockdown Nicholson. What ultimately led me to the english workbench is that because i had no bench there was no way i wanted to try and laminate a big slab with no bench and no clamps. I would have needed at least $100 in clamps wich i would rather spend on wood or other tools i need(the list was really long). Plus I kind of liked the history of the English workbench and I am an OCD person that likes stuff to match. I want all my chisel handles the same color or brand etc. Since many of my old (and new)hand tools are made in Sheffield, then an english bench fit my ocd( i don’t own any french tools). I finally broke down and bought the video series and started last October I think it was, and slowly got the wood and worked on it on weekends. Mine is in the gallery, one of the Steve’s Benches(there are a few, mine has the flipstop in the middle so i can use f clamps.
What I will say about finishing the course and bench:
1. I learned WAY more than I thought i would, not just the obvious like the dovetaild lap joints and half laps etc, but all the little tips and tricks, and shortcuts one can only learn from someone who has done this a long time and is good at teaching.
2. I enjoyed every episode: hd quality, good sound, good music but not annoyingly in the whole video like a lot of youtube videos, humor, pace.
All said and done, i think i could probably sell my bench on CL for at what I spent on wood. I think it would be worthwhile to build both benches, learn all of the various skills as they both use different joinery. At the end you keep the one you like better and can sell one(or keep if you have the room), and end up learning what would cost a couple grand in a weeklong class, plus you now have a bench(or two) for a fraction of the cost.
3.
Thanks, Steve! Wow, that is incredibly similar to my situation (and probably many others). I agree with everything you said. I had been running into a lot of “cheap” builds where the wood was technically affordable but the cost of the required tools and clamps was astronomical. Richard’s video checked all the boxes for me: great technique, good, historical design, funny and totally unpretentious, and geared toward beginners. “You don’t need a workbench to build this workbench.” Love that.
Thanks for sharing your experience, and great job on your workbench! Love the flipstop.
Not being Richard, but… I guess the answer to your question will be very individual. (Paraphrasing Robert Pirsig, the real bench you are building is a bench called Self.)
Comparing the intro to the English Bench narrative, I get the impression this new build is half a notch more demanding – not basic kit, but router planes and a band saw; not lap joints, but mortise-and-tenon, drawbored.
I am slowly gearing up to a bench build, working on the saw horses, and having just secured a wooden vice screw from a German chap very affordably. Despite my love for the Roubo bench, it will be an English bench, which is much better suited to my skill level, and its torsion box will keep it straight and square in whatever environment it may end up.
Still, I subscribed to the new series as soon as it showed up. Different techniques, different perspective, and I will finally be able to decide whether to go with a leg vise, or a face vise…
Nice, think i will be into this one. Great job.
I am finally wrapping up my English Workbench and don’t need another one right now but… I am sure this will be full of useful tips and likely more entertaining than that Marvel nonsense so couldn’t resist. Look forward to chapter one.
You do know Richard, that when you’re doing or demonstrating or teaching anything French, you are obliged to use WAY more words than is strictly necessary!
Good news! Can I learn some wood carving techniques like the Native Artwork?
Do you have a new dog? Hope the old one is doing well.
Great question! I am in same boat. I have the English Workbench plans and just saw this one. Would like to know your opinion on this, Richard. Thank you.
Dan
Damn. Now a decision. I’m about to move shop and wanted a new bench. May have to consider this. It’s just that I have this old quick-release iron vise that I bought in my teens 60 years ago. Probably better suited to English, but this is so tempting. That vise is just elegant. Damn.
Both designs are proven to be effective. As long as you can work your faces, ends, and edges (no overhand of the top or aprons), either one will make a great bench. The best way to determine is the material you have on hand. Typically, the english workbench requires less material and you won’t have to laminate a thick top or try to source thick pieces of lumber. Some prefer the thick top of the french bench and some prefer the wide aprons of the english bench. One of the biggest cons of the wide aprons of the english bench is not being able to use f-style clamps easily. But that’s what a holdfast is for! It’s personal preference mostly combined with the materials you have available. And then you have to decide on the face vise! The leg vise seems to be the most versatile, but a lot of people do not like the traditional parallel guide. It’s nice to see that Richard will be showing how to create the crisscross mechanism in this series!
Regards,
Chris
Thanks, Chris. I’ve never used holdfasts; might just need to take a leap of faith.
Or do it as Richard suggested in the English workbench video: leave a slightly wider gap between the top planks and you can use an f-clamp.
Are there plans to make this video on dvd?
I finished the english bench last winter, but still… I like to build things, and this could be the next thing. I need more surface area in the shop anyway, so why not?
Joe, I have burned my own discs from the downloaded videos, though certainly without the production values a dvd menu provide. A temporary fix?
Helen, not to be a pest, but I see the paint, and have to ask if we get to see it made this time?!
Always a pleasure ordering from you.
David
That looks like another great bench. I still prefer the English bench as it is more usable and easy to construct.
I could really use an additional bench for projects in my garden which is located about 6 km from my house. My current bench was built with old wood and is a huge slightly varied version of the English workbench from Richards’s/Helen’s series and is not going anywhere.
So, I think I will build this but a little later this year after I get my garden up to speed and finish some of my other projects.
You have a new dog but we haven’t been introduced properly or I missed it.
Don’t need another bench at this point but have ordered the video nonetheless as I always learn so much from your videos. Presently making raised flower planters – hardly bespoke woodworking but enjoyable and a damn sight better than buying some this way I can decide the measurements and design.
I have a proper Roubo bench (it’s no eye candy, this. It’s got coffee stains and saw marks and the chop was never finished properly so I’ve got to do that eventually…) and I still want to order this video.
Hi Richard,
Nice bench. I wish to maintain the ability to store things under the bench. That means – no front rail!!
If I compensate with bigger dimension legs and a thicker slab top, will that do the job? I am thinking of an 8 foot bench.
Hi Brandon, yep, that would work fine. Some of the earlier French type benches didn’t even have rails. Instead they relied on a thick top and a double tenons connecting the legs to the top. A double through tenon would be a great way to go to get the rack resistance and general strength. They can look a bit tatty but strength is your main focus. You could also beef up the width of the rear rail, even an extra inch will go a long way.