You’ll be pleased to know that all of the machinery made it back to our workshop safe and sound after Richard’s trip down to Kent back in April. The details have been left in limbo as on day two the photos were taken by various visitors and we’re just gathering them up ready to share. Just to build up some suspense; details of the grand ‘Line Shaft Removal’ will be coming soon..

Meanwhile, in and out of a rather busy schedule we’ve both been up to our eyes in a centuries worth of grease and caked on dust. It doesn’t truly fall under ‘Line-shaft Machinery’ as it runs off a three phase motor but it was for that reason that we focused our attention on the cross-cut saw first. We can get this one up and running before taking on the challenge of re-installing the line shaft itself.
We’d been pleasantly surprised at the great condition of all the machines but knew they would never work to their full potential without being stripped right back and cleaned from the inside out. We started timidly at first anxiously removing parts from the saw until it was down to its bare bones, each of us hoping that the other would remember how it all goes back together. Richard soon got to grips with the workings so we broke the small sections down even further so they could be thoroughly cleaned and re-greased.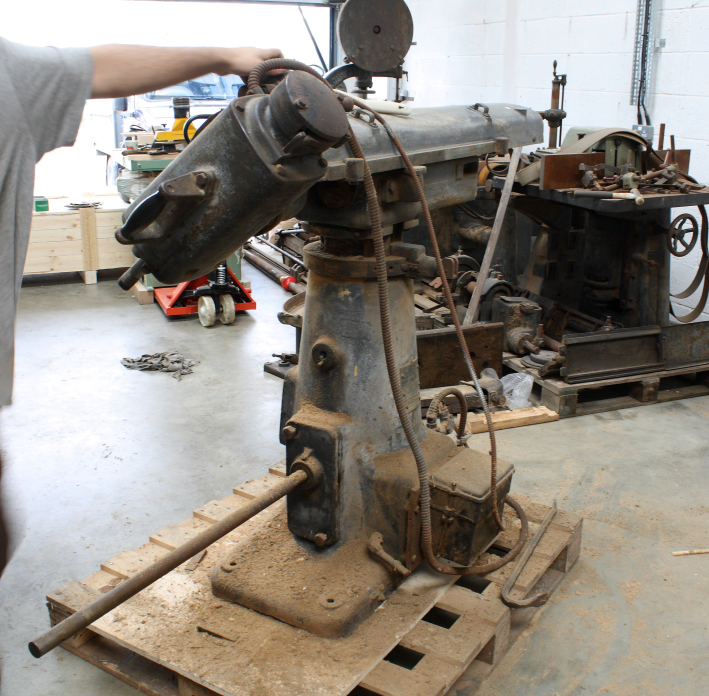

There’s nothing glamorous about scrubbing and scrapping all of the old metal especially on evenings, weekends and yes even bank holidays but I couldn’t help but become fascinated by the whole process. It’s extraordinary to see the now shiny parts and imagine just how old they really are but even more extraordinary to try and understand how they might have been manufactured and what minds could have made it all possible in a time long before computers. It certainly gave us food for thought as the hours passed by.
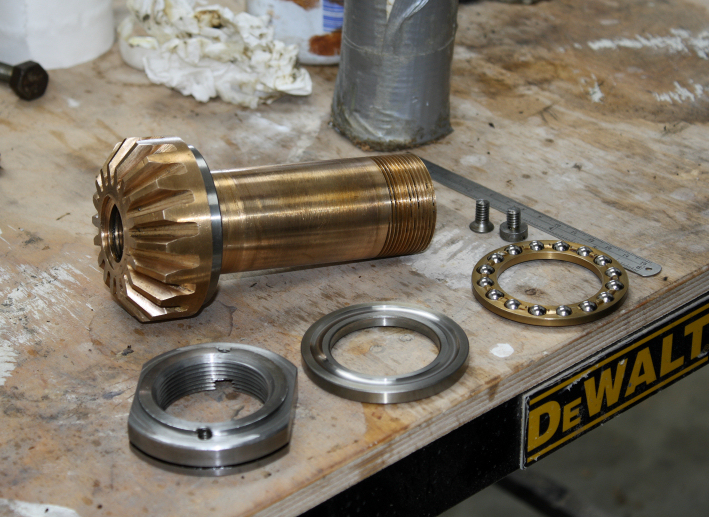
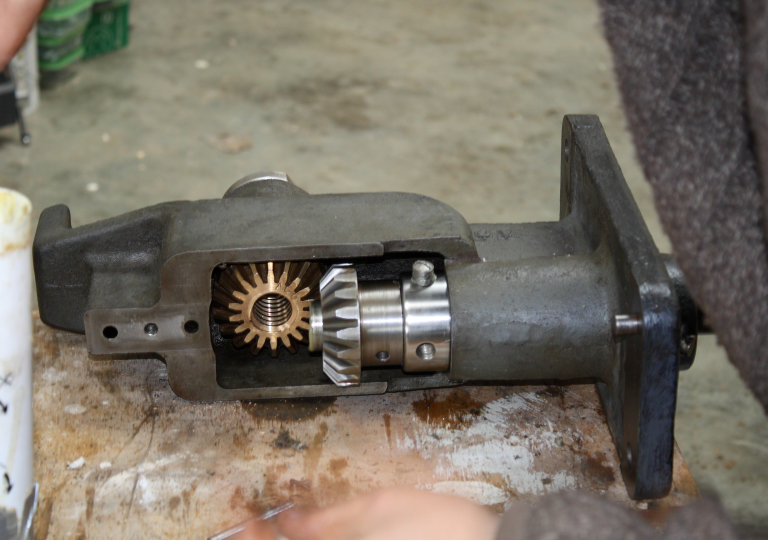
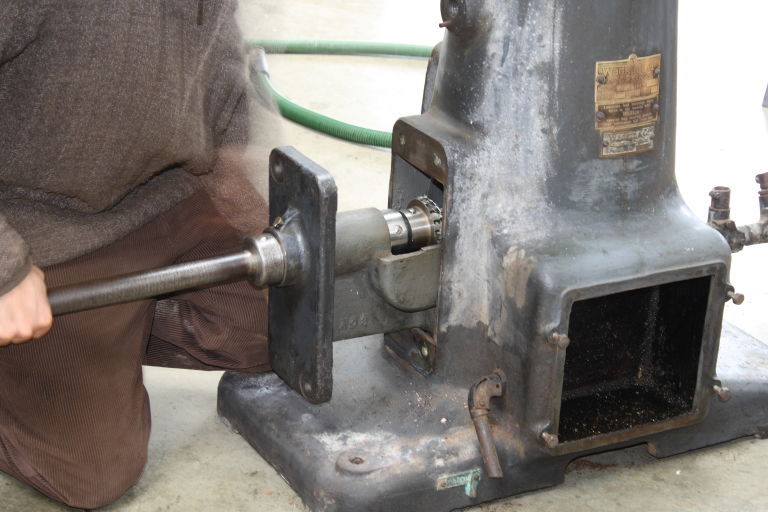
As each section was completed we reassembled it so nothing could get muddled up. Here the central turret of the machine is going back together, all of these parts are just to control the rise and fall. The recently lodged hand wheel now spins freely, even on the rise!


what a grand project, i saw the post several months ago when you went to pick it all up. t was an amazing sight…and i was looking forward to this day, a lot of work , but the joy to work on some fantastic equipment , and see it come back to life and then use it to make some wonderful wood work….ill enjoy every picture you post and every detail you write about.
Hi Bob, Thanks for the encouraging words it certainly makes a difference to know that there are interested people out there following the progress. I’ll let you know that the saw roared in to life this morning and Richard is just finishing the table for it so I’ll get the details on for that soon.
Kind regards, Helen
Those cleaned-up components look in great condition.
Cheers 😉
Paul
Thanks Paul, On a lot of the wear parts we noticed that the original mill marks were still visable and we know the saw has had a lot of use.
Cheers, Helen
Hi Helen & Richard,
Looks amazing. Makes me a little emotional. So glad this ended up with you. To think it could have been ‘restored’ by the travelling community.
Will send some more pictures soon.
Ben
Hi Ben,
It’s great to see you are following the progress, I hope that we’re doing them proud. We’ve already had some lovely travelling folk offering their service but I think we’ll continue it our way 😉
Hi Helen/Richard
I’ve been following your progress whenever I can. I’d love to be involved in a project like yours. It combines all the things I love in life (apart from the wife, maybe) and I’m looking forward to further pictures and progress reports.