[youtube https://www.youtube.com/watch?v=PtayvNvIa6E]
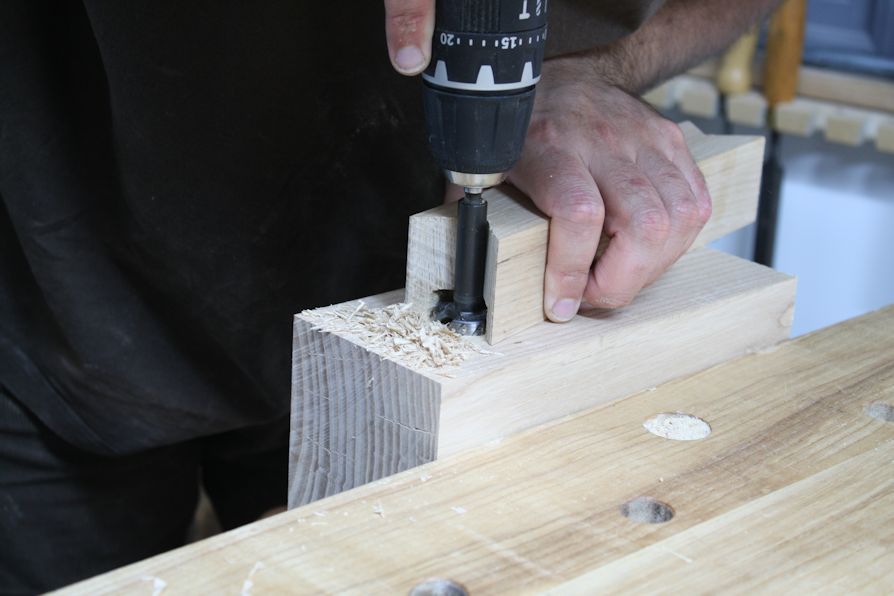
If you’ve been a follower of our blog since its beginning then you may remember me writing a post on a simple guide I use to aid drilling dog holes square. Well in today’s video I take a closer look at this guide with a demonstration and a few tips on making your own.
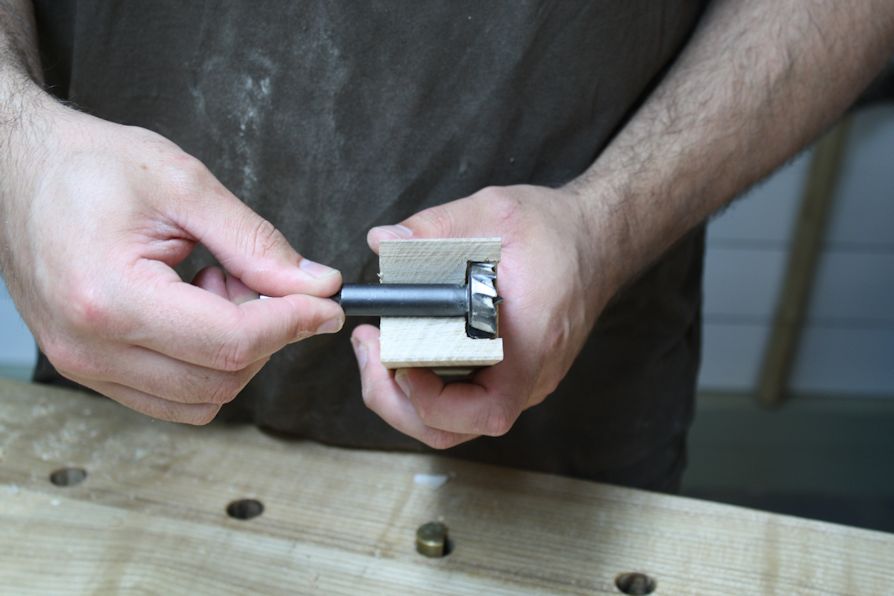
With just a simple amendment to your guide it can also be of use for forstner bits. All that’s required is a clearance at the base of the guide which needs to be at least the size of the drill radius to allow the shank to rub against the notch – the use is pretty much the same as before.


![Which Saws Are Best For Ripping Thick Stuff? [Video]](https://www.theenglishwoodworker.com/wp-content/uploads/2022/12/what-hand-saw-is-best-for-thick-rip-cuts.jpg)
![How do I Sharpen a Router Plane? [Q & A Video]](https://www.theenglishwoodworker.com/wp-content/uploads/2022/11/how-to-sharpen-a-router-plane-video.jpg)
![Bench Top Edge Jointing [with Video]](https://www.theenglishwoodworker.com/wp-content/uploads/2022/10/bench-top-edge-jointing-video.jpg)

Nice work Richard, just made mine. Thanks for this one buddy. 😉
Hi Ken, you’re more than welcome. I hope it works for you.
Yep it works great, thanks again Richard. 😉
Richard,
What is the name of the waltz you are playing during your video? I dance Argentine Tango. The waltz you use is fast enough to be used for dancing tango.
Also, I am now using your bench top baton with a hold fast and dog for hand planing. It’s wonderful!
Lastly, I can’t get enough of your blogging and videos!
-Mark
Thanks Mark, I’m really pleased to hear you’re making use for the holdfast and batten! As for the music, it’s by an artist called Emma Wallace, she has a few albums and we really enjoy her work…not sure about me dancing though (I run like a baby elephant!)
Thanks Richard. Great blog and tips.
2 questions:
1. Which type of drills do you use for drilling your dog holes, and do you worry about tear out on the underside, or does the right type of auger drill as you used in the video prevent this?
2. Do you ever countersink them to make the hole neater, and do you sand or prep the surface again after dog hole drilling on a bench?
Thanks very much
Rod
Hi Rod. I’m using a brad point in the video, I like to ensure it’s a good quality bit such as Colt. Even with a high quality bit I do burn through them quickly drilling dog holes regularly. As long as the bit’s in good order tear out on the underside is minimal and can be cleaned up quickly with some sandpaper.
I do always countersink the top of dog holes, it helps keep them tidy especially if you’re using holdfasts a lot. I always do the main flattening of a bench top before drilling and then give it a light swipe with the plane to finish the flattening after drilling and countersinking.
I hope this helps
The best of all tools ,quick and easy to make,with materials picked up off the workshop floor,and each jig custom made for the job,excellent!
Chris,
France.
Richard,
As for useing the Colt for forming the holes,I have tried this,but the bullets tend to leave a lot of break out on the underside!!
Chris,
France.
Hi Chris, I do find a bit of tear out now and then but generally I’ve found the Colt bits very good for this.
Thanks very much Richard. Very helpful.
What size countersink for 19 mm or 3/4 inch dog holes please? Ie 19 mm or bigger
Thanks
Rod
Yeah, I would like the answer for that one. Good question 😉
Hi Rod and Ken, the countersink bit would need to be at least the hole diameter or a bit larger. If you don’t have a bit that large then a good solution can be to set up a chamfer bit in a router and guide it around each hole. Alternatively some coarse sand paper could be used to at least smooth over the edges.
Thanks v much. Rod
Another great video Richard and a really simple but effective idea I shall be passing on to my colleagues and students. Thanks,
Matt
Thanks Matt, I hope it comes in useful!
richard, thank you so much for the work you and your wife do to make these videos, i truly love them, from start to finsih , this is a great addition to you web site, thanks again…bob…a.k.a the grizzman.
Thanks Robert, very pleased to hear your enjoying them. Much appreciated.
Damn, I wish I found your website and saw this a week ago. I now have a complete collection of slightly out of square holes in my ” Milkman’s workbench ” build. 🙁
Still it’s my first project so I’m still fairly pleased with the results.
Some great tips here for a novice like me.
It’s always best to learn from other people’s mistakes…..
Thanks for spreading your great wealth of knowledge and experience.
Mark
Everything is very open with a clear description of the challenges.
It was definitely informative. Your site is useful.
Many thanks for sharing!
Rough as chuff….
I came here because I thought you were going to drill a square hole from the title… and I thought that would be pretty amazing.
Like the videos, could do with a few more though, and looking forward to getting my vices!