A workbench should be heavy, very heavy.
So I build a lot of benches with good thick 4” tops and simple but robust bases.
Now a days we tend to call this the French bench, mainly due to recent trends in workbench designs.
I don’t think the evolution of workbench designs was clear cut or defined so regionally, but there are without a doubt some features that were favoured only in particular areas.
I’ve seen countless workbenches, some very early, that you could easily mistake for the ’French’ design even though this certainly wasn’t their origin.
The ‘French’ bench as we know it is, after all, really only one step evolved from the very basic design used by the Romans.
So the French workbench remained simple. It could be massive, it could be petite, but it did always remain simple.
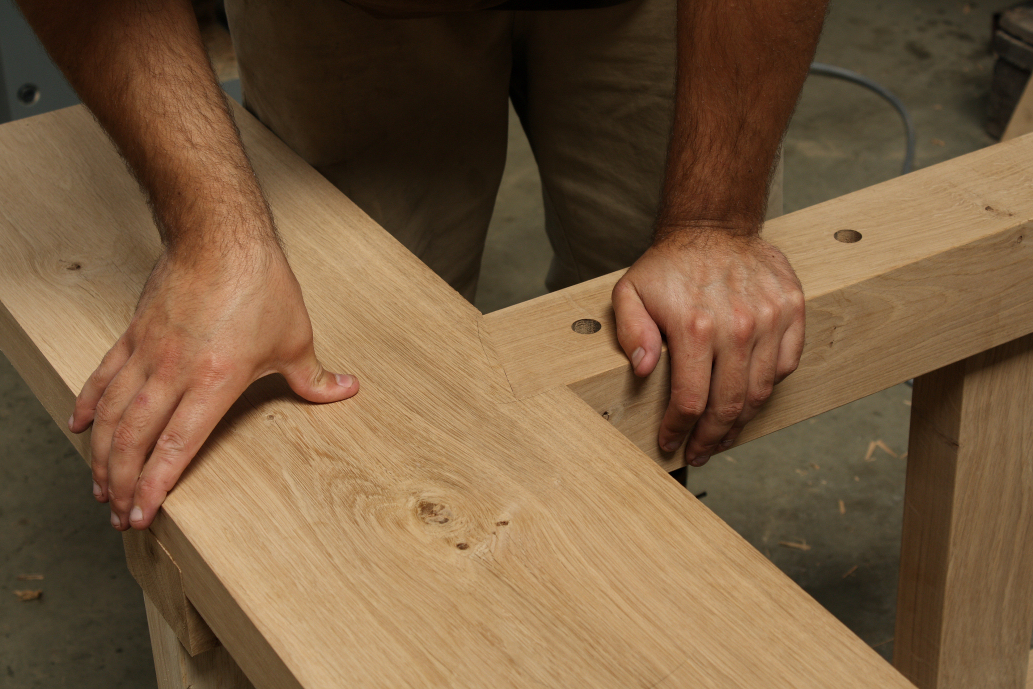
Now, if we nail a couple of deep aprons on the front and back of this ‘simple’ workbench design then what have we got?
The Nicholson Workbench Design- An English Tradition
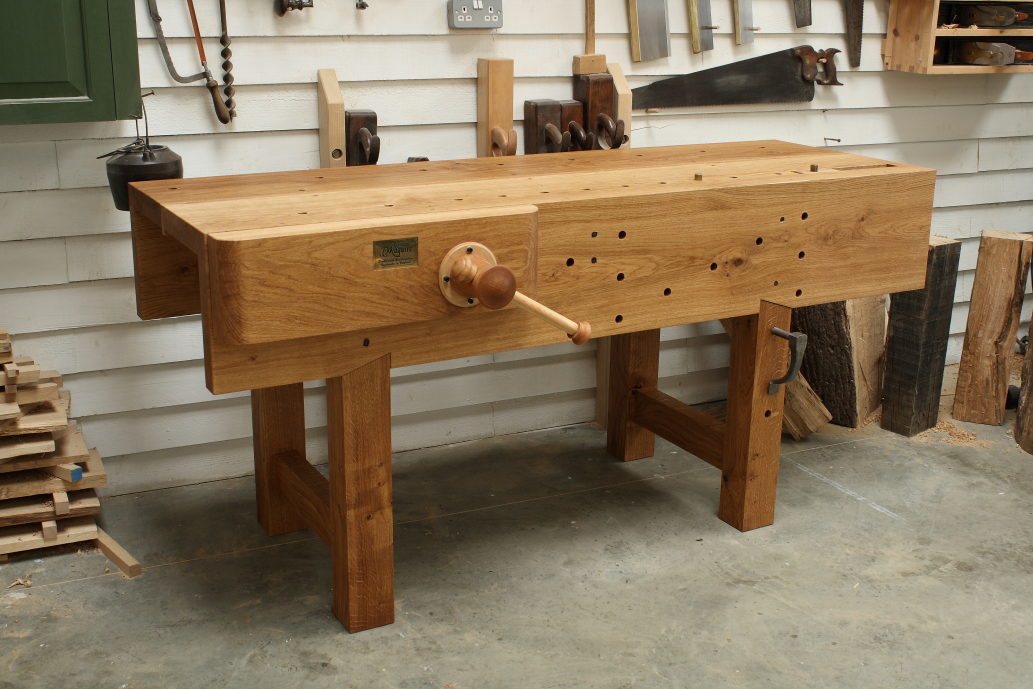
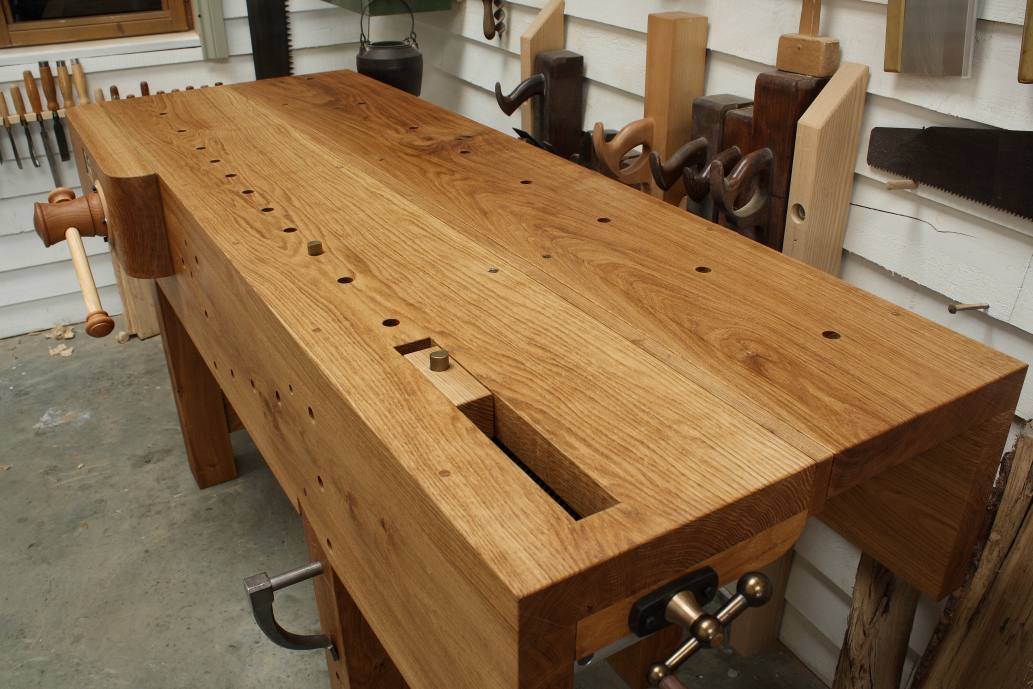
The English, or Nicholson workbench design is robust, simple and well worth considering if you’re planning to build your own workbench.
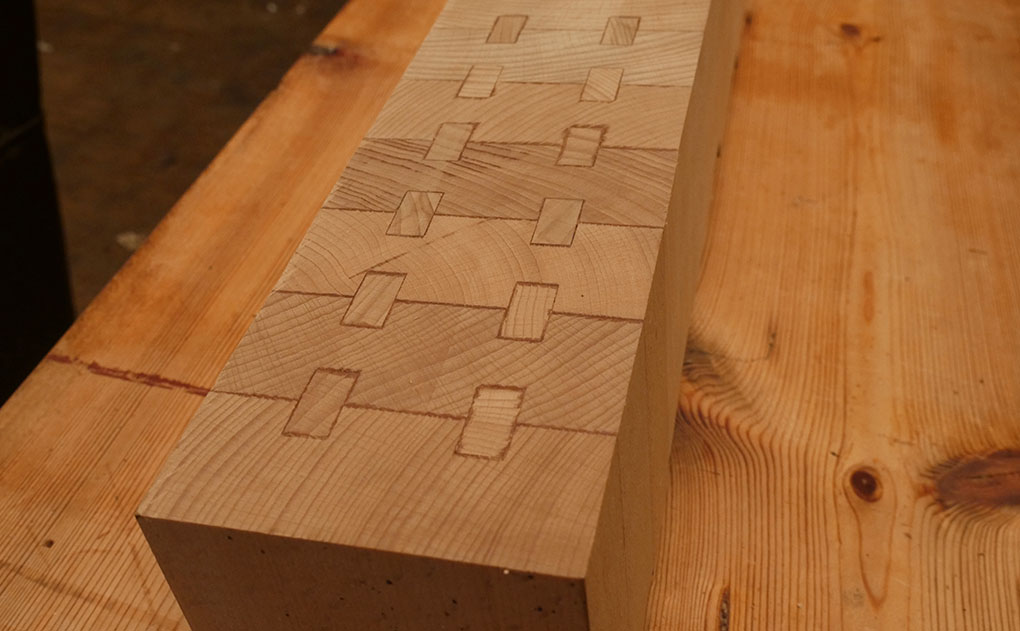
The photos shown below are of an English style bench made in oak, although pine tends to be my timber of choice for this bench design.
The oak bench in the photos was built for a customer, and whilst this example had the top nailed down, the design is closely based on a knock-down version that I previously built for sale.
If you’re interested in building your own workbench, then the English (or Nicholson – as many people refer to it), is a surprisingly accessible build.
You won’t need to laminate the top.
This alone will save you huge amounts of time and headaches (read more about the planked top here).
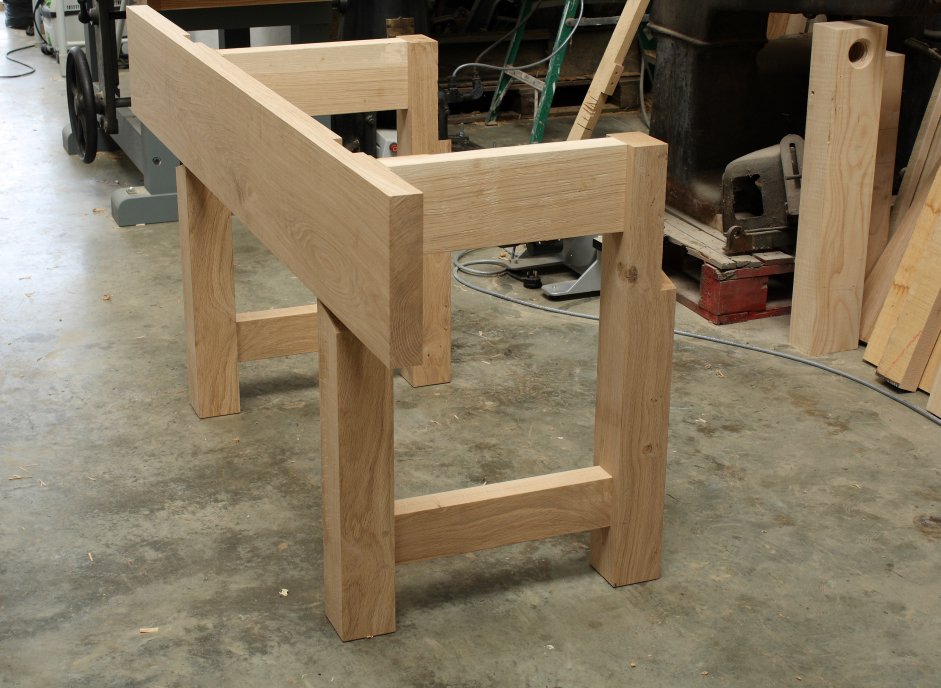
And the simple joinery is forgiving, yet incredibly strong.
If you’re looking for a rock solid workbench, but don’t want to spend all year building it then the English bench has a lot to offer.
We’ve produced a full video build of a traditional style English workbench.
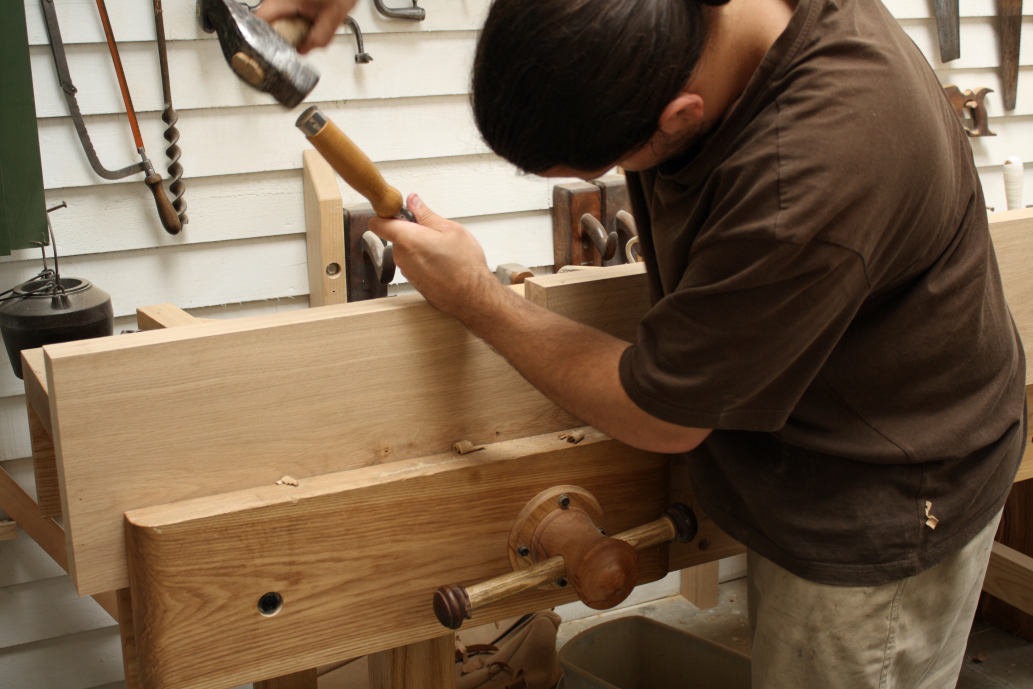
The build is shown using minimal, basic hand tools. And you won’t need to bench to build it from… we build off a couple of saw horses.
There’s step by step instructions, explanations on the techniques, and PDF plans to follow.
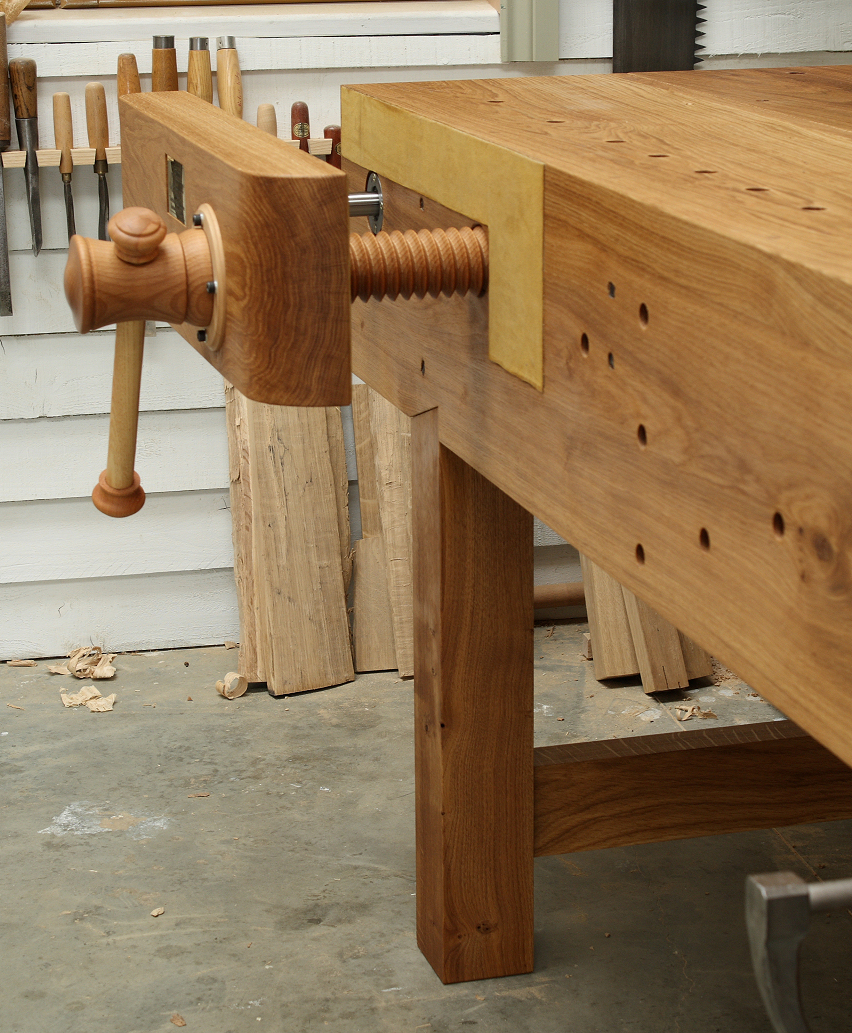
We even build a traditional face vice, starting out with a screw & nut.
Interested in building along?
You can watch the Intro video here.
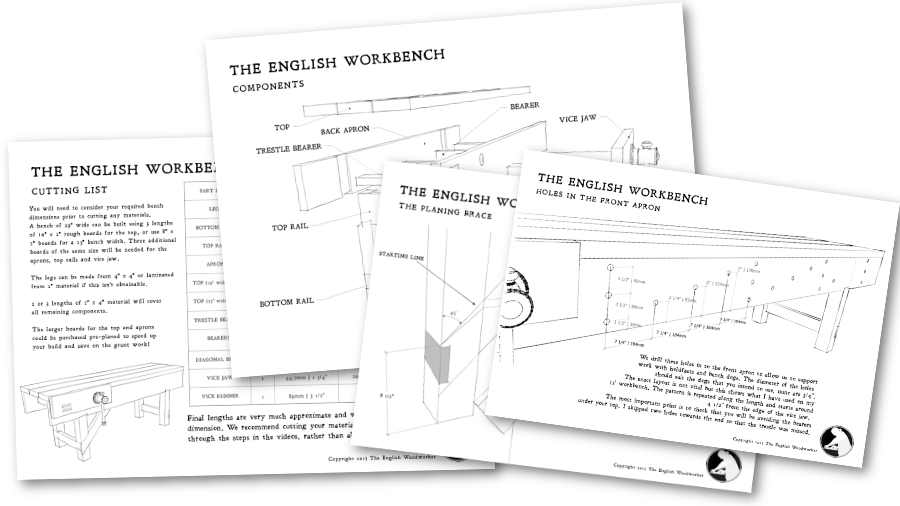
Building Your Own Workbench? Click To See Our Detailed Video Series With PDF Plans.


BUILDING YOUR OWN ENGLISH WORKBENCH? See our detailed Video Series with PDF Plans.
[vimeo 147665349]
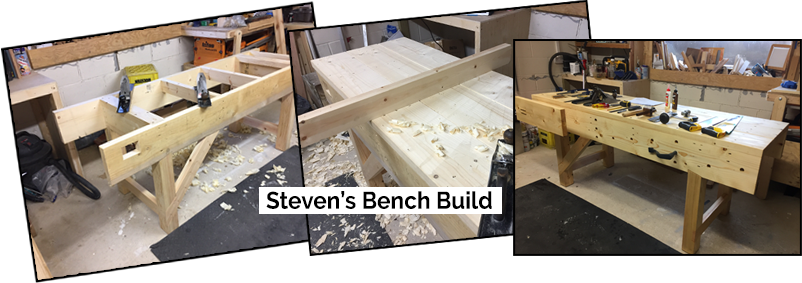
It’s been an amazing project to do and I’ve learned a lot. I can honestly say if it wasn’t for you and Helen making these amazing videos I would probably of ended up with some YouTube screwed together thing! – Steven
![Simple Work Holding For Ploughing Grooves [Without a Tail Vice]](https://www.theenglishwoodworker.com/wp-content/uploads/2022/07/workholding-without-tail-vice-copy.jpg)
![Gluing Up A Workbench Leg [VIDEO]](https://www.theenglishwoodworker.com/wp-content/uploads/2022/06/gluing-up-a-workbench-leg-video.jpg)

Richard
Are you marketing your vise for sale and if so how much shipped to the U.S.?
That is truly a remarkable bench!!
Laurence
Hi Laurance, Thank you for your kind words. The vices are for sale and we send them regularly to the US. If you take a look at our You Tube channel http://www.youtube.com/user/MaguireWorkbenches?feature=watch you’ll find videos of all our vices. If you wanted to drop me an email at richard@rm-workbenches.co.uk then I can provide you with more information.
All the best, Richard
Now, if we nail a couple of deep aprons on the front and back of this ‘simple’ bench design then what have we got?
A Nicholson
Do I win the bench if I’m right? 😀
Ha, I’m affraid I can’t stretch to the bench Patrick but I like your cheek so that’s got to be worth a hand forged holdfast! Check on your emails, it’ll be on its way. 🙂
Oooh…I’m not sure my inbox could take the weight mate.
What is the purpose of the miter joint where the legs meet the apron? I’ve seen this as well as a regular butt joint on Nicholson benches. Is more aesthetics or purpose?
Thanks
Kerry, that’s a really good question. I’d definately say that’s it’s none essential on any workbench today and adds a considerable amount of time to the joint. It does however add a lot more shouldered surface area than a straight joint and together with the locking fit of the angle it certainly resists rack a lot better. My gut also says that it was often done because it was known to be best rather than because it was necessary and maybe the woodworker felt that the guilds / other woodworkers would look down on them for anything other. And also as Patrick puts it, ‘it looks SO much nicer’!
Are you referring to the angled notch between the leg and apron? I would think the angled notch prevents movement better than a butt joint plus it looks SO much nicer.
Hi Richard,
Incredible bench! Lovely design.
I made a very similar style bench (although much simplified and in fir – from the Paul Sellers series) and I was wondering how you attached the top to the supports? I had bearers on top of the leg frames and screwed through those and into the benchtop, along with screws through the apron into the benchtop. How did you secure the top securely?
George.
Hi George, on this particular bench the top was secured to the front aprons with wooden nails (or pegs) and then it was secured to the top bearers of the trestles with hand forged iron nails. The construction of this bench was in keeping with some earlier English examples however on other benches that i’ve built of this style I’ve often used lag screws. These go from underneath the bearers rather than above.
Thanks, Richard
p.s I’d love to see a photo of your bench!
I am actually in the process of making a very similar bench, but I have a problem understanding how you raise and lower the dogs with the front apron being so large. Could you explain how to practically use dogs with the tail vice?
Hi Jason, That’s a good question and well observed. The English bench wasn’t designed to include a tail vice so the difficulty of raising dogs was never a concern. Usually when I build a bench of this style I’ll leave of the tail vice off for this reason although this customer was keen for it to be included. You could still include the tail vice, the dogs would just take a few extra seconds to raise although you may prefer to get it to the practise of using holdfasts and planing stops for much of your work instead.
Richard,
Thanks for the answer, that makes a lot of sense. I will probably build my bench without a tail vise to begin with, to see if I can work without one. But if it turns out I really want one I recently stumbled across “prairie dogs” made by veritas, These seem like they would solve my problem.
Keep up the good work. I always love reading about what is brewing in your shop (woodworking projects and tea :-P).
Cheers!
Jason
Hi Richard.
Nice looking bench.
It looks like it is made out of elm?
Brgds
Jonas (Denmark)
What you have is an English style work bench. The aprons and top form a very rigid box section that I believe keeps the top flatter than any other method. I built mine this way because there was comment on the US blogs about how superior continental benches were and how you could not clamp work down to the top. Providing the aprons are thick enough 1 1/2 to 2 inches an “F” clamp works very well indeed with the screw end sitting on the edge of the apron. Where the apron really comes into its own is holding boards on edge for jointing
Hi Richard,
Are the bearers simply but jointed and nailed into each of the approns?
Also, do these tops have a tendency to split? It seems like there is no allowance for the flat sawn boards of the top to expand and contract.
Thanks
The bench is beautiful. Tell me, what is the purpose of the angled joinery at the intersection of the apron and leg?
what logic did you use for determining the dog holes for the apron?
Love the idea and it obviously works, was wondering why not use dovetails or through moritses to attached the top to the frame with wedges to keep things tight?
I am now building a bench – for various reasons it has taken a year so far hand planing and sawing but because the components have now sat glued up they are very dry. Combination of douglas fir floor joists 10×3 inches and larch furniture grade 7×2 inches. All is knot free and good grain. So now i need to make the top i have a choice of more fir or larch. Both are good the fir is much softer and it took a lot of hand sawing. Larch would be much easier to dimension. As a temporary top i can use mdf because my frame has a ladder like construction. What do you reckon on larch no knots no resin pockets. I have a choice of many strips 3×2 inch thick laminated face on face or 2 inch thick laminated edge to edge but i could then make 2 layers of 2 inch thick and then glue the resulting wide planks face to face. I am not an expert so some good advice would be nice. My 2nd diy bench ever and my last.
I just got the course for this bench, which is excellent.One thing though is, I wish to know more about the rod and bearing approach I see you use for the vise in some of the pictures here. It seems substantially easier and better than any alternatives.