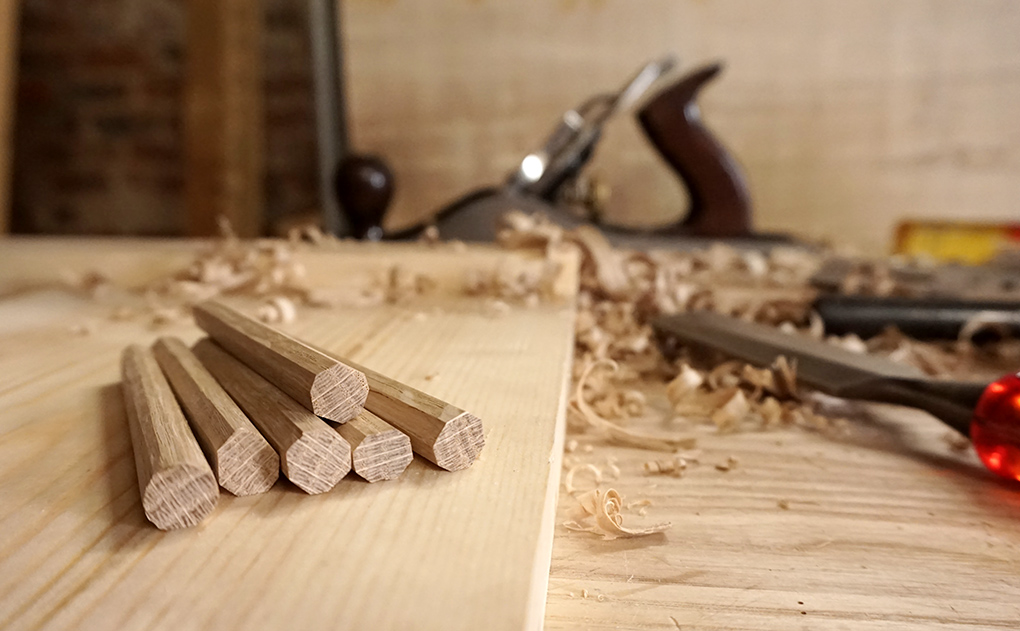
 A good peg, is a lot more than a roughly ragged out bit of round wood.
When you’re draw-boring, or just reinforcing a joint, you need a peg that’s strong.
A good wooden peg should be straight grained, slightly tapered and preferably made up of a series of flats.
In this post we’ll look at my favourite method for peg making – the ‘Split & Whittle’.
This is all about timber selection, as we need a peg that’s straight grained and with the grain running parallel in both planes. You should also use a good stiff hardwood like oak, and be sure it’s nice and dry.
I normally use riven wood for this, that’s wood which has been split from the log rather than sawn, as this way you’re almost guaranteed to get that straight and more importantly, parallel grain.
You could also rummage about for a perfect bit of sawn stuff for this, though Method Two is better suited for using sawn material.
How To Make Your Wooden Pegs:
You need to cut your blank much longer than the thickness of the material you’re pegging in to. Here I’m cutting my blank to 4″ for pegs that will go in to a 2″ thick table top. This extra length makes it easier to handle, but more importantly allows some flexibility in your taper.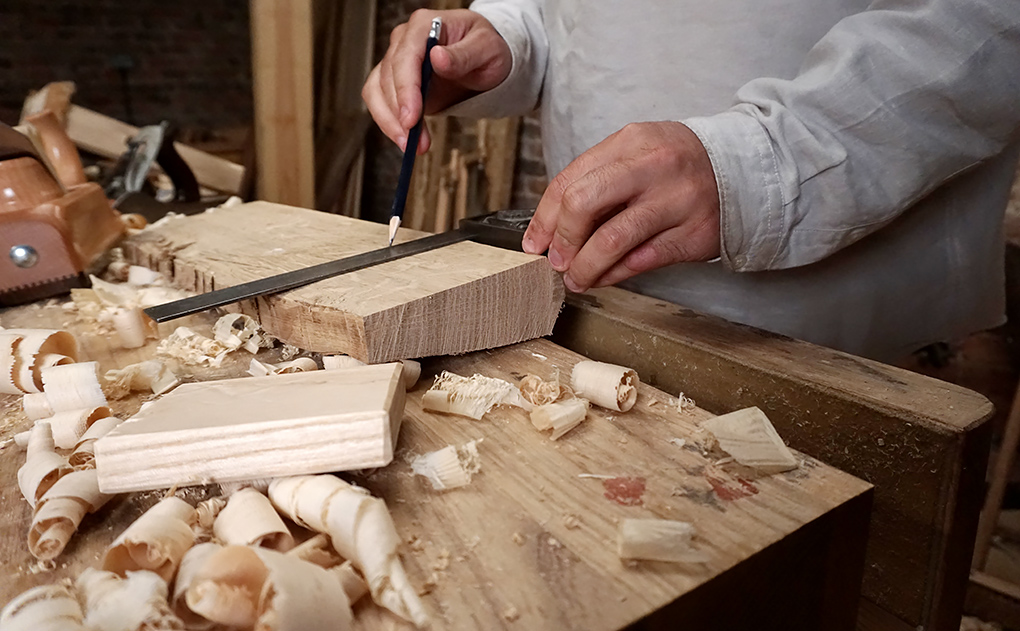
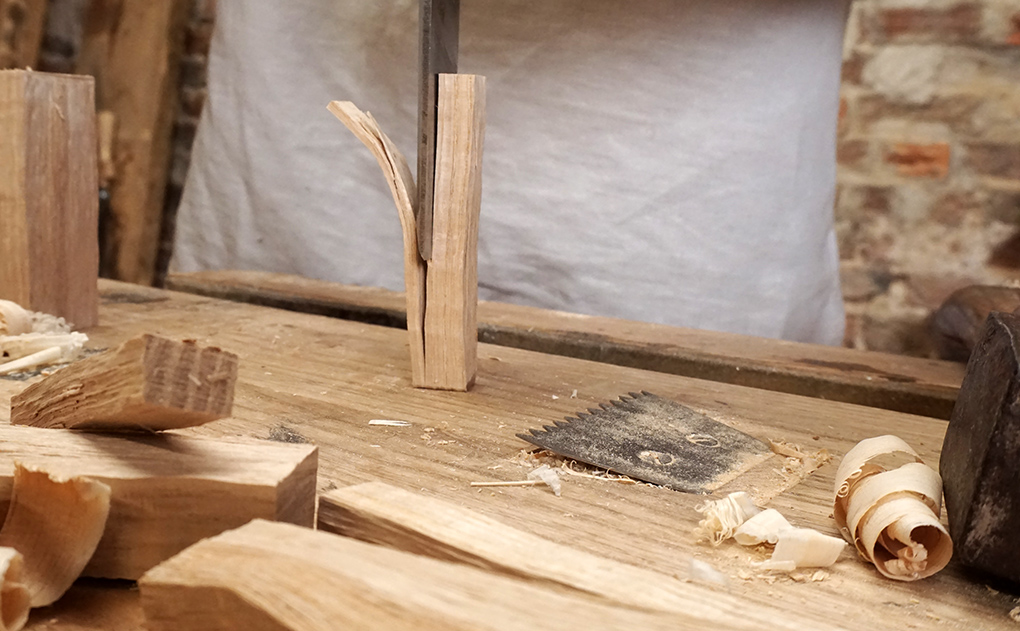
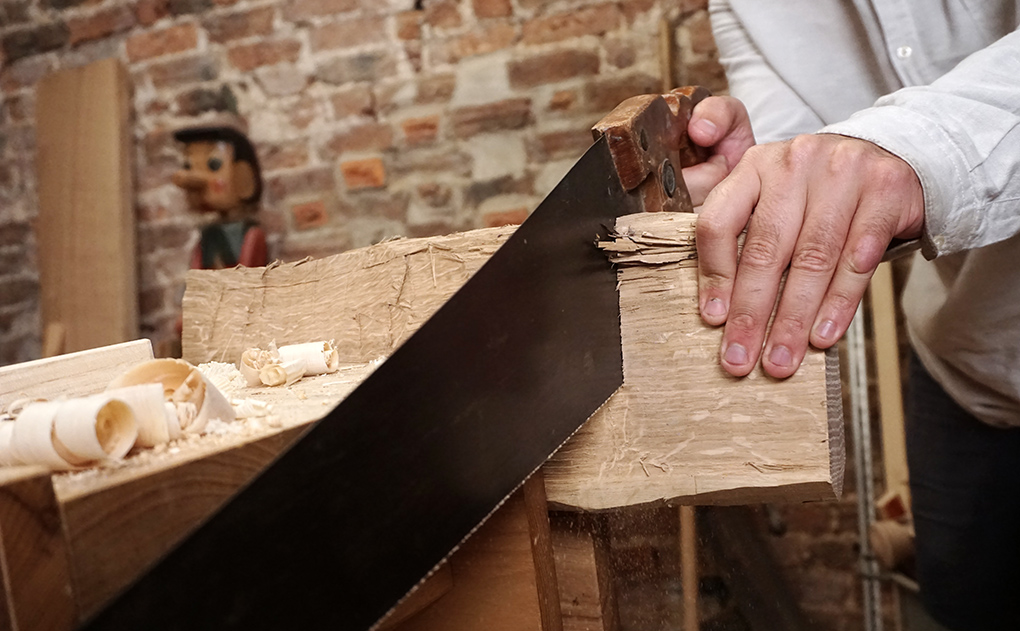 Break your blank down by splitting. I was always taught to split in halves whenever possible, so I split the first half, then split those halves in half etc, until I have a load of bits that are close but still quite a bit bigger than the diameter that I need.
How much bigger you stay will depend on your experience. After making one or two you’ll get the feel.
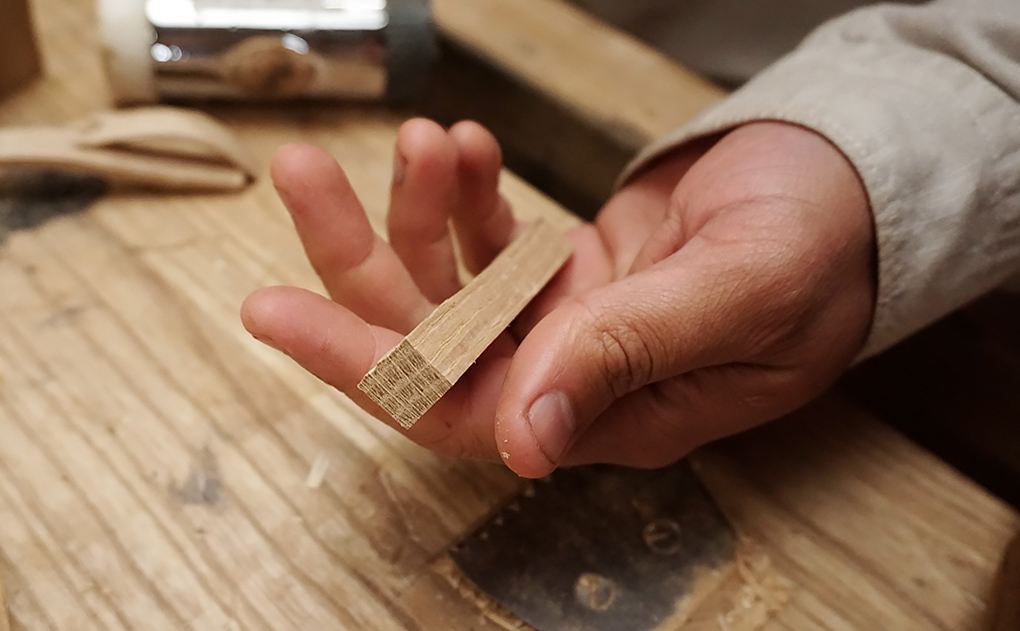
It’s a lot easier if you’re blanks are close to square, so I refine them with a chisel by splitting a slither off one side.
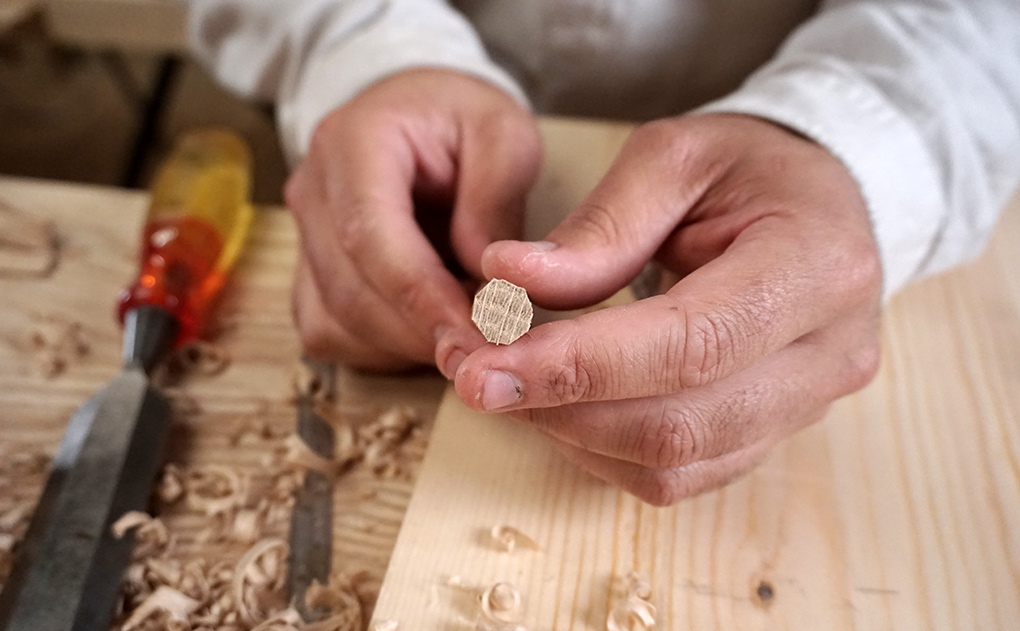
 We now have a square ‘ish’ section of wood. Next we need to turn that in to an octagon.
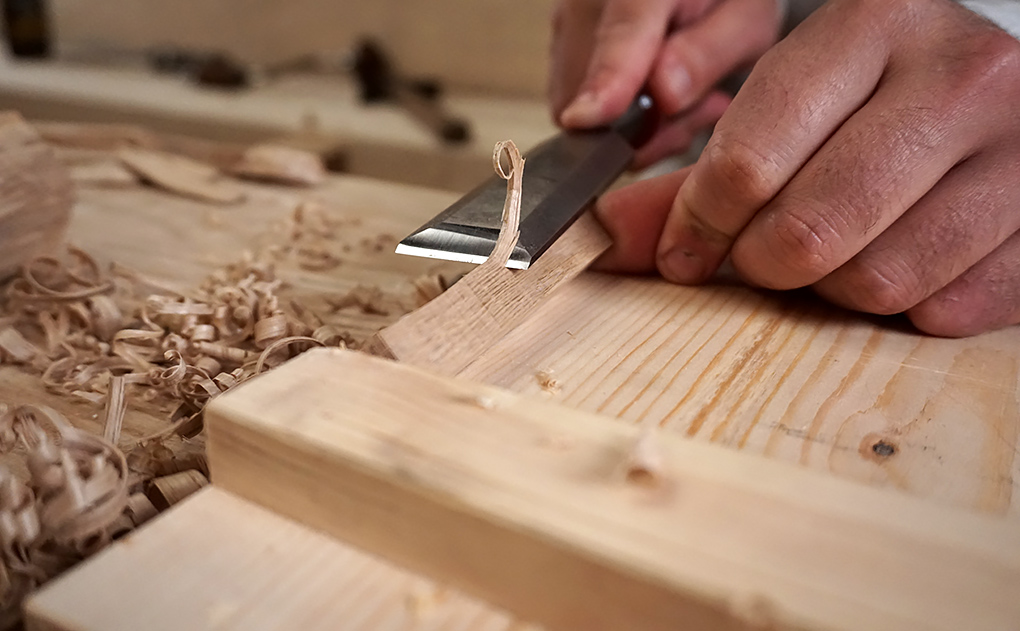
I like to use a bench hook and a wide chisel for this. I start in a bit to make this safer and more controllable. I take little slices down the corners until one end becomes an octagon.
The other end will still be square, so just turn the piece around and repeat.
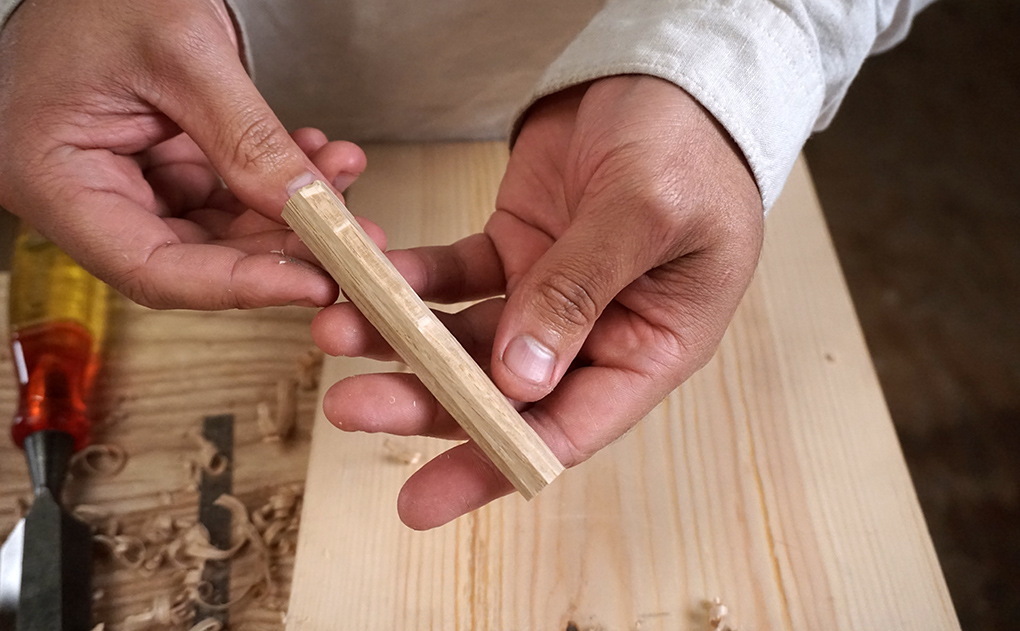
This doesn’t have to be dead precise, but do spend a bit of time trying to get it all fairly even. I start working the taper in to the peg at this stage as well.
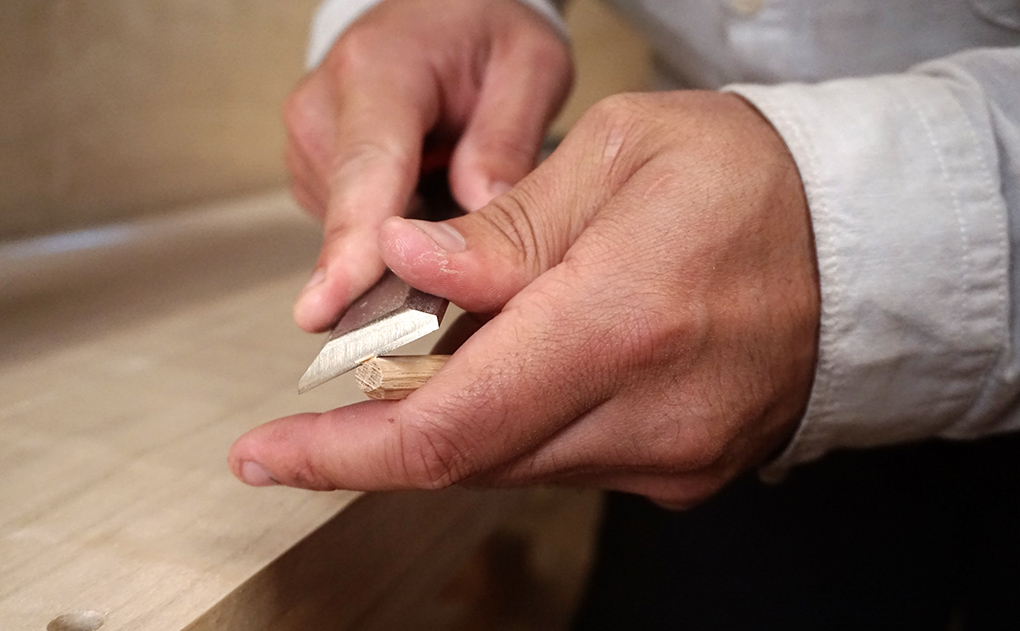
 For the final refining it’s best to mount a hand plane upside down in your vice. Rest a flat of the peg on to the plane’s sole and push over the iron to take a shaving. The taper is formed by putting more pressure on to the back-end as you push through – it only needs to be slight.
Do this on each facet, one shaving at a time to keep the peg as even as possible. This is very controllable and easy to make adjustments.
Drill a hole in some scrap at the same diameter that your pegs are being made for. You can use this to keep checking progress. You want the first portion of the peg to slip in freely, but the taper should cause it to start locking up.


Once you’re happy, put a little point on the thinnest end using either a chisel or a knife. This it to help ease it in and spread the glue as it goes, rather than just scraping it.
Using Your Wooden Pegs:
Do you trust your glue alone, or prefer to reinforce?
To use them simply drill your hole at the planned size, squirt in a bit of glue and spread a little more on to the peg itself. Now give it a good whack in.
I prefer a metal hammer for this as it helps you feel when it’s in good and tight. Once it’s twatted to the max you’ll hear the sound change.
Let it dry then cut it flush.

This process may seem extremely slow written out in-depth like this, but once you get going you’ll be bashing these out in minutes.
Your peg will have the natural strength of the grain without any weak points, and you’ll be able to see how well it locks in with its taper and flat facets. Plus the taper will always ensure a good, neat job.
Perfect for reinforcing joinery.
This full process of peg making can be watched step by step as part of our Hall Table Build Series – you can find full details of that here.
Or if you’re having trouble fitting the joints themselves, then have a watch of our video on correcting an out of square mortice & tenon.
![Pt 2: Reamers & Tenon Cutters: Use & Applications [Shop bought vs Homemade]](https://www.theenglishwoodworker.com/wp-content/uploads/2026/06/355735B8-6EB7-48E7-8135-A45EC52D5F2F-400x250.jpeg)
![Pt 1: Understanding Chair Joinery: Tapered Round Joints | [ FREE 6 Part Video Course]](https://www.theenglishwoodworker.com/wp-content/uploads/2026/06/D4FD5406-5390-49FC-B939-255EFF4F845C-400x250.jpeg)

![Bench Top Edge Jointing [with Video]](https://www.theenglishwoodworker.com/wp-content/uploads/2022/10/bench-top-edge-jointing-video.jpg)

Love these little “tricks of the trade”. A seemingly minute detail can make all the difference. I’ll definitely be trying these tips. Thank you!
Kevin.
Thanks Richard. This is just what I needed!
During the English Workbench build, I’d asked you about attaching the top boards to the bearers with wooden pegs instead of nails. You replied that pegs should work fine as long as they’re “proper tapered pegs.” I wasn’t sure about the best way of shaping such pegs, and now I know.
I too am intrigued about using pegs versus nails for attaching the top boards on The English Workbench; although then the question would be how long should they be and how beefy. I feel that pegs would give my product the true hand built effect. Just asking.
“twatted to the max” I’m going to have to work this into my verbal repertoire.
Excellent description, Richard – thanks.
Great advice Richard.
I was looking after a dowel plate but now it seems to to be straight forward process.
Can you explain is there a reason why your pegs are more an octagon rather than circle? Is it because of the techinique of making them (we are accepting imperfection) or is ther additional hidden advantage?
Sylwester
A dowel plate is easy make using a piece of steel such as an old plane iron ready for recycling. One that won’t hold an edge for cutting work will still be fine for hammering a blank through. And you can size your dowels to fit how you work. Use a center punch to dimple the steel to prevent the drill skidding, put a small drop of oil on to be nice to the drill bit, and drill the hole. If you have a decent reamer, you can flip the piece an expand the exit a little. That makes getting dowel out very, very slightly easier.
When putting your plane upside down in the vice, be careful not to over tighten it as I’ve heard that might bend or even crack the side walls of the plane.
Also, to the uninitiated, the hole in the tenon should be slightly offset towards the shoulder in order to draw in the piece tightly when pegged.
I love draw boring and do it whenever I can.
Hello Richard,
Thanks to the link David R give in the trust of reinforce post I also saw this video:
https://www.youtube.com/watch?v=y-FEdWJ5LVI
Here you can see a great tip around 2:00. That would help make it even quicker.
This guy is really good and I’m lucky I know a bit of German, so I can understand what he is saying.
One trick I find helpful when making pegs is to use a brace and bit to score each end of the peg. This sets a line (circle) to work to on each end. Hope it helps!
Hi Richard,
thanks for your blog and videos. A treasure chest.
Do you also drill the holes with a conical bit?
Meikel
I am wondering about strength for an end vice mount or would you use a large dovetail?
Thanks for all your blogs.
A tip on making pegs, is to keep them square/rhombic in the end and make this end slightly oversized. Then they’ll bite into the wood and stays, also when the glue gets old and withers. Lining them up in the same direction also creates a nice pattern of small diamonds on your surface. This is often seen on old furniture.
Fastest way to cut pegs is splitting and then using a normal sloydknife, cutting towards your thumb. Don’t bother about some uneveness – additional angles that bite in the wood, deeper in the hole is just adding extra holding strength, together with some space for the glue.
Hi Richard.
In Russia in the old days used square in cross-section pegs. I think this allows the use of pegs are made from softer wood such as birch, pine, spruce or fir. And the pegs lock very tightly.
Would you like to try this variant of pegs?
Best regards