It’s felt a bit back to roots of late as we’ve been talking a lot about workbenches, but for those already set and ready to build you might be relieved to hear that we’re now well on with a new furniture build.
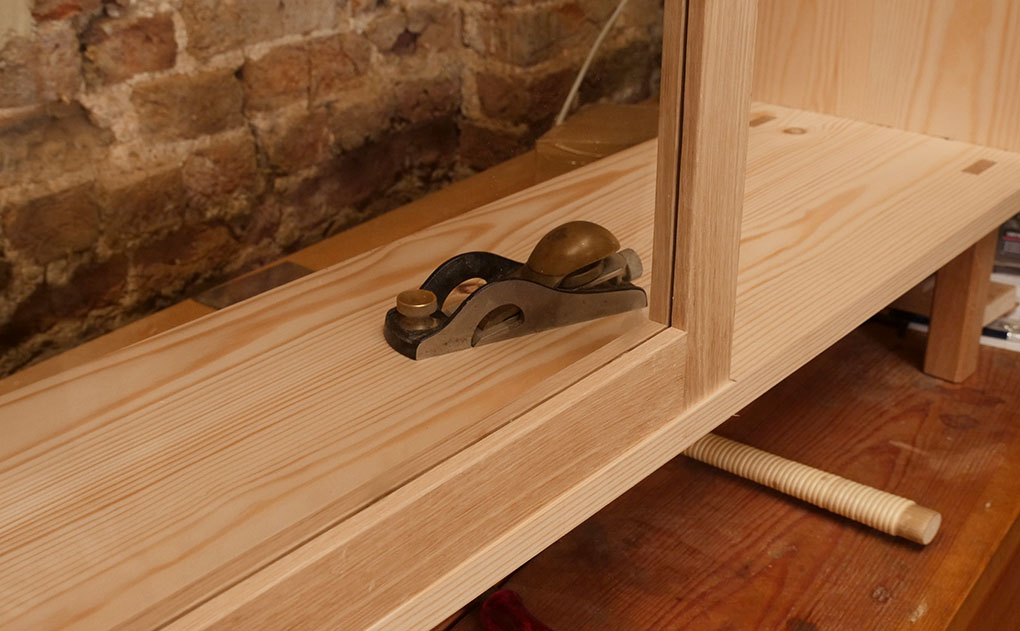
After giving thought to everyone’s requests and looking to come up with something practical, we’ve opted for a sideboard. It’s got a nice retro feel and is designed for display with glazed doors.
Sourcing the right timber for a project can be one of the biggest headaches.
Along with choosing tools, “how to buy good wood” is perhaps one of the most common questions we get asked about.
The challenge of buying and working kiln dried hardwoods by hand, has led us to doing something a little different with this build.
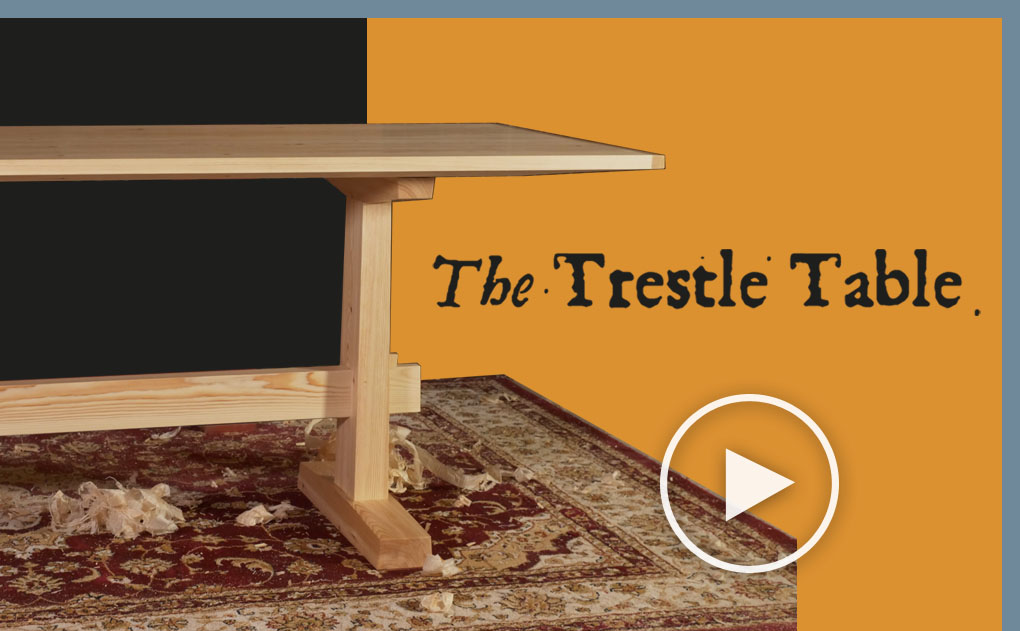
Material wise it’s a bit of a hybrid.
The bulk of the carcase is built from pine – easy to source, kind on the pocket and fast to plane.
We’ve then used oak sparingly for various details. It’s a fun way to build and if you have a few boards of a really beautiful wood, it’s a great chance to put it in to focus and make it go pretty far.

Tying two woods together is always interesting if not a bit nerve wracking when it comes to the finish. I’m getting close to that stage now, and I’m holding my breath a bit at how it’ll all turn out – I’ve got high hopes.
The build process will be ready to share shortly so we’ll keep you updated with how it’s coming along.
Not familiar with our Videos?
We make online courses that provide tuition on hand tool woodworking.
The detailed videos can be both streamed and downloaded.
As a professional hand tool woodworker, we aim to get you feeling inspired to build, and equipped with the knowledge to tackle projects entirely by hand.
View our full Collection of Video Series HERE
Or sign up to our Free Plane Build Mini Series HERE

Greatly looking forward to this new series Richard and Helen.
Looking forward to seeing the new build. Is that a Japanese handsaw partially hidden in the picture?
Greg
I use both pull-saws and push-saws, though mostly the latter. Just can’t figure pull-planes, though I sometimes pull my Bailey patterns.
Richard and Helen. Looking forward to seeing the new build. Hope you are all well
Great stuff. I love the idea of a sideboard. Really enjoy and value what you do, Richard and Helen.
Thanks.
I have made mine at 7 foot with leg vise all done and in use.Only the worse thing was fixing in a slide and bottom to connect with opening vise. Using a brush shaft pole and wedges with steel bolt with big mushroom top with angle grinder cut off to just five inches and loss of thread. I find after many tries I needed a wider insert as holes in shaft made it weaker. Cut out a 0ne inch wide Scots pine board and drilled in holes. Then cut the oblong hole in bench leg. It works well now. Strong tidy and linseed oiled the lot. Yellow and lovely to work on. Have fitted the shelf for planes and an apron swt into leg tops and bench top so front is flat so I can use it as hold with holes for clamps. No glue used just dowel and pinned the whole thing. Strong no movement and looks the real thing. Thanks Richard for showing me the way it is made. I used all your ways but think wood must be happy to shift a bit so glue is not idea I use. If i want to take bench down it is easy too.
Ouch, a dovetailed carcase. I should definitely do the spoon rack first, though I alsohave a couple of dovetails to cut on other projects. A little breakfast-tablet-thingy for the kids to play with (one tail – I can manage that), the drawers for my Dutch tool chest (the carcase is dovetailed, though not that well done), and finally the drawers for the side table (after I manage to cut the mortises – but this project is on hold).
But first I have to build a bench for our dining room (till Christmas – yikes!). Taking inspiration from Christopher Schwarz’ blog I opted to base mine on the English Workbench as presented here – after all, I got the workbench built, so I should be able to do that a second time! Material will be pine for the frame and aprons, not sure what I will use for the seat. Maybe the nasty gued up wide boards and then paint the top white (or blue?). Maybe I’ll taper the legs a bit, should look nicer than a 2″ wide (and 3″ deep) one (yes, it will be hefty, but it will also be 2 yd long!)
Wish me luck!
… and I’ll buy the video anyway, as a Christmas present to myself…
I am really looking forward to this. You always do amazing work!
Intriguing photos. I am looking forward to seeing the completed build. I like the idea of mixing oak with pine…should make some beautiful contrasts in the joinery.
Yes!!! This is great Richard and Helen
A can’t wait it’s like Christmas come early 👍
About time 😂