Teaching and woodworking are two very separate skills.
That’s something I realised when we started making our videos.
The big difference is, you can’t work on auto pilot while you demonstrate.
Everything has to be deliberate, almost exaggerated so it can be replicated by those watching.
As I work now I talk to myself, asking what’s happening.
It’s helped me to become much more conscious of how I’m doing things, and why.
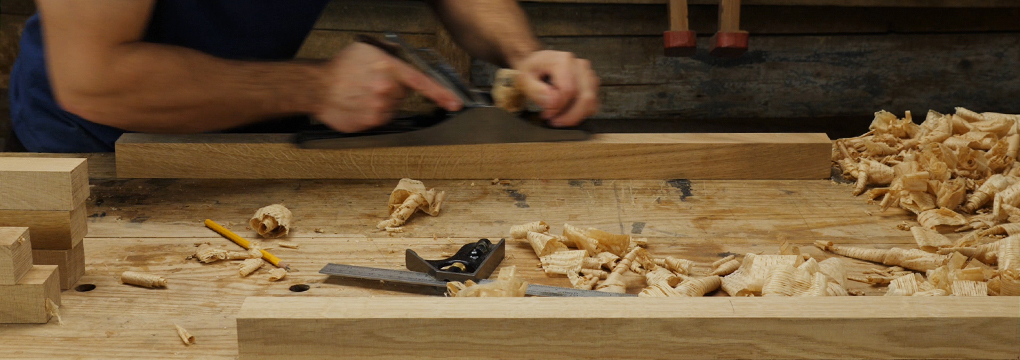
This was useful when I was first looking to explain how to use a hand plane to flatten boards.
It’s not easy to show what’s going on with an individual board, but after much self discussion I realised I was approaching with the same steps 90% of the time.
These kind of patterns emerge a lot when you start to look for them.
Predictable Errors
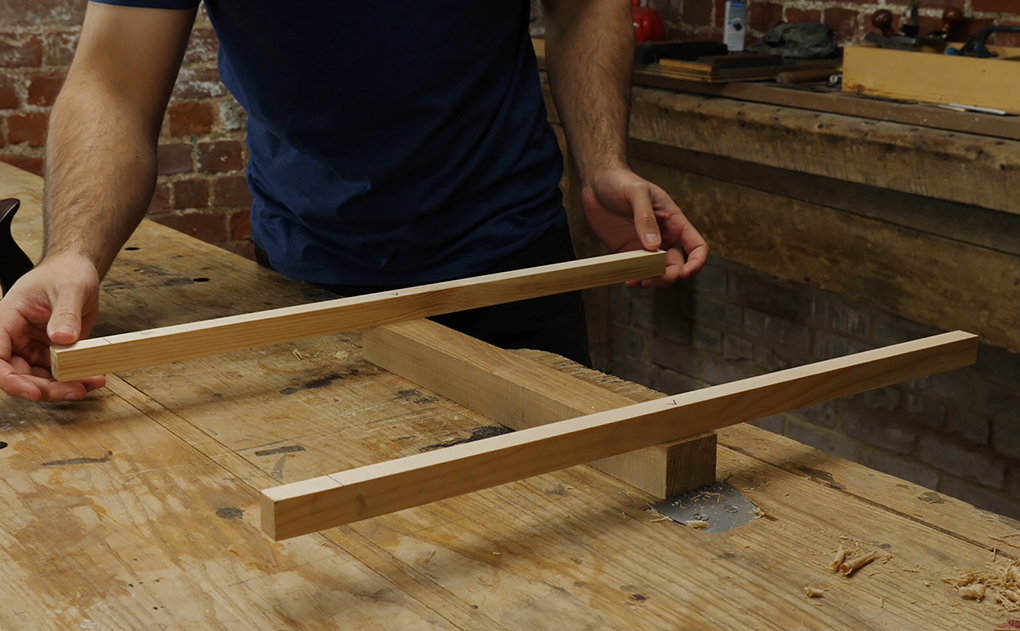
Another pattern or habit that I’ve found I do, came up when I was flattening a lot of skinny lengths. When the wood ain’t much wider than the plane.
When planing these narrow pieces, I always find I’m twisted in the same direction every time on my initial reference face.
Too often to be chance.
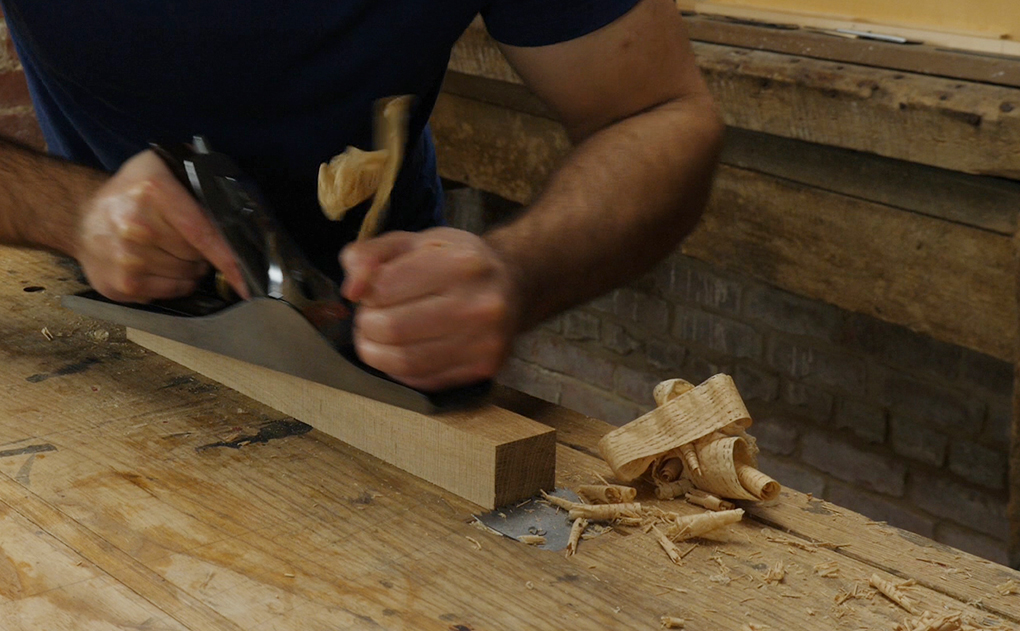
I realised that it’s down to the imprecise way that we push a hand plane.
We’re stood to one side of the plane, pushing in an almost twisted manner.
That’s the most efficient way for our bodies to push.
But it’s kind of like having a planer or thicknesser with a cutter block that’s only attached on one side.
You’d find the block would flex a tad under heavy work towards the open side, and create a predictable error.
If an engineer was to tell you how to use a hand plane, they’d probably say to hold it central to your body, and push with both hands evenly.
That wouldn’t be practical, but understanding all this helps a lot when flattening those skinny faces.
Anticipating Twist
When learning how to remove twist by hand, it can feel uncontrolled.
One tiny shaving can send things completely the wrong way.
Experience improves the process but when it comes to fine tuning you may feel like you’re back there at the beginning.
The problem may just be that natural twist.
It’s something we can learn to expect and compensate for.
I’ll often over correct deliberately, putting the twist to the opposite side that it wants to fall.
I know that when I tie everything in with some through shavings it will naturally pull it slightly the other way, and send it right.
Even if I go too far with that over correction, I only have to come in and smooth the surface and eventually in comes back around.
How Much Should You Correct?
The amount that this happens can depend on the plane you’re using.
The more solid, heavy, rigid planes don’t have as much of this effect, nor do most wooden ones I’ve used.
The effect is also more noticeable on harder woods.
It will be personal, but try to observe a pattern, you’ll then be able to deliberately start correcting that error.
If you’re still getting to grips with hand tools then we have plenty of articles to help get you working swiftly:
![Pt 2: Reamers & Tenon Cutters: Use & Applications [Shop bought vs Homemade]](https://www.theenglishwoodworker.com/wp-content/uploads/2026/06/355735B8-6EB7-48E7-8135-A45EC52D5F2F-400x250.jpeg)
![Pt 1: Understanding Chair Joinery: Tapered Round Joints | [ FREE 6 Part Video Course]](https://www.theenglishwoodworker.com/wp-content/uploads/2026/06/D4FD5406-5390-49FC-B939-255EFF4F845C-400x250.jpeg)
![Remove Saw Set = Improve Your Joinery [Video]](https://www.theenglishwoodworker.com/wp-content/uploads/2026/01/9D16FCB8-2406-4C54-93C9-550C75097009-400x250.jpeg)

Congratulations! You’re starting to learn to teach. It will make The English Woodworker even better and it’s one of the best already.
Thanks for putting words (also if it is in English) on my frustration. I’ve been there so many times and still overcompensate a lot…
Pardon my dull wits – which side do you find usually cuts deeper, assuming a right-handed grip on the plane?
It can be different for every one, but the twist is usually to the right at the far end, if you agree with James Krenov’s observation.
I also discovered that I was planing twist into narrow boards while flattening them. Always the same way. Must just be the natural angle of attack, leaning on one side more than the other. Easy to rectify of course but interesting.
I’m still working at counteracting my natural tendencies with a plane. The onlynthing I’ve found is that I need to check the results really often. I have a nearby window that’s flat, so most narrower pieces I can set against the glass and rock to find the high spots. For anything narrower than the sole of the plane, I set the edge of the plane flush to the lower side…the mouth ends before the edge, so it can’t cut anything from that side. I’ll shave the far side down but it might leave a slight hump in the middle that will require a few careful swipes.
A camber on the blade helps too
I am still learning and these notes reinforce my thoughts of how to go about things!
Thanks
Wow, this was right on the money but needed to be written because it is probably most often overlooked. Based on this and several older videos from Richard I watch from time to time, it is time for me to make a suggestion I have made before.
I think it would be great for a full course on hand planing which should include everything about using the most common planes and some of the specialty planes. I have seen many YouTube videos on using planes but they almost always focus on setting the plane up, sharpening the blade, care and maintenance then a couple of minutes on using. The using part almost seems to be an afterthought.
The course should be an A to Z thing which would include as much as possible and address as many common problems as possible. For example, why do my boards tend to be thicker on the starting end then the other end when I am smoothing them. Or, what about the funny skip marks at the front of the board? Or I what should I do when my plane stops cold for no apparent reason such as knot. I have found shooting boards to be a mystery and I use one very often but It seems to be more work then necessary. And how about a small smoother like a Stanley #3 with its very small footprint. What about really think stock or really hard wood? Richard has discussed many of these things already so putting them all together into a course makes sense to me.
Many readers will scuff at this suggestion but I like it for several reasons:
1. Richard is a master at using these wonderful tools. I go back to lots of his early stuff like the small box video where he uses several different planes so efficiently and with so little effort. the work bench series has some very useful tips as does the most recent table series.
2. The second reason is that Richard fills these videos with a treasure chest of little tips that many or most of us will use time and time again. It took my watching the little box video several times before I noticed how he flattened the boards and this was a video without him talking or providing instruction.
3. Helen and Richard produce some of the most interesting and entertaining videos I have seen and/or personally developed. As Richard once mentioned there are thousands of videos out there but most are not really worth watching. Richard’s teaching technique coupled with Helen’s production make these courses much more than worth the price. I guess I would call their approach the anti-LP system. Remember when you would purchase an LP just to get one song? Perhaps there would be one or two more you liked but that was about it. Well we buy the course to make a table or bench or rack and get so much more. Watch it again and there is even more.
I would compare this with the series on sharpening. I have been sharpening my tools for decades but took the course anyway and learned so much that I use Richards system almost exclusively. I’m sure he would do the same with a hand planing course. This can be seen in this blog post about predictable errors.
Think about it.
Hi David. I’m not scoffing at your idea – I support it. The nuances of planes & how to get the most out of them in speed, consistency, & quality would be great.
Btw at home I run with a pair of old Stanley #3 and a pair of #5 for most work. I love the #3 for jobs often given to block planes, for small work & also for a light scrub with a radiused blade. For brutal scrubbing I have a veritas scrub plane.
John,
I am with you totally on the #5 and #3 with I also use. I have w Stnaley 5 aand one 3 and use them most often. I also use the # 3 where many would use a block plane. I have considered the buying a Veritas Scrub plane and glad you mentioned it.
Thanks David,
It’s on the list!
With a subject like this where you’re looking to be all encompassing, the challenge really is being able to sit and come up with all of your thoughts on the subject. Even though you know it all, it’s nigh on impossible to just sit and get it all on to paper.
With the sharpening course I just observed how I work for a year or so, and wrote down all of the little problems that I’m thinking along the way.
I think that’s the only way to ensure it’s comprehensive.
I probably would have forgotten to mention this tip on twist, for example, if I was to just sit and think about the problems of hand planing.
So it’s certainly on the list, and thanks for your suggestion, I just feel that to do it right it’s something that I’ve got to prepare properly for.
And thank you for the kind words – it certainly means a lot!
HOLA RICHARD, me pasa lo mismo que a muchos. Y me fabrique esta canteadora manual del video que te adjunto, estas de acuerdo con esa herramienta ?
https://www.youtube.com/watch?v=qGcfgE_eDf0
Hi Richard, very important topic to hand tool woodworkers and very well written. I was recently trying to build a wooden hand plane from your plane build video and it was a second try out for the build and I failed again with the very same problem. I just can’t plane the cheeks of the plane flat and straight! Two failures and I’m feeling not so pleased about it. I have only a Stanley #5 to play with, maybe smaller plane would be easier?? Anyway, great post from you. All the best!!
Hi Joni,
Precisely flattening can be a challenge, but you don’t always need to be precisely flat.
If you’re looking to glue two faces together, it’s better to make sure you have a slight cup in the centre than have a bow that the pieces will rock on.
And if you’re worried about twist with the hand plane, then just make sure that the centre portion is fatter than your iron. If it does end up a bit twisted, just glue the thin cheeks on – they’ll hold, and you’ll have enough play to get your iron in. Once the whole things together just make sure that the sole is flat.
Cheers.
Thank you Richard for your advises, it truly means a lot. I’ll have a third try with the plane build later this spring, after I have build a workbench from your video series. All the best!!
You mention over-correction and in my opinion that is something you have to be really aware of. I use a couple of two foot (60 cm officially) aluminium rulers as my winding sticks and it took me ages to appreciate how much they exaggerate the degree of wind (which is of course what they’re meant to do but learning to allow for it is the tricky bit) and that often led to unintionally exaggerated correction on my part.
I’m now at the point that where they show a tiny bit of wind, I ask myself just how critical flatness is for that particular board and I also flip it over and test it on the bench i.e. does it rock when the ends are prodded? So if the answer to the question is that it doesn’t have to be scientifically flat and it also doesn’t rock then most of the time it is more than good enough.