Today we’ve made a start on our Coffee Table build – if you’ve joined us already then you can Login Here to watch Chapter One.
Or find more details HERE
I set about this build without a clear direction on what the table would become.
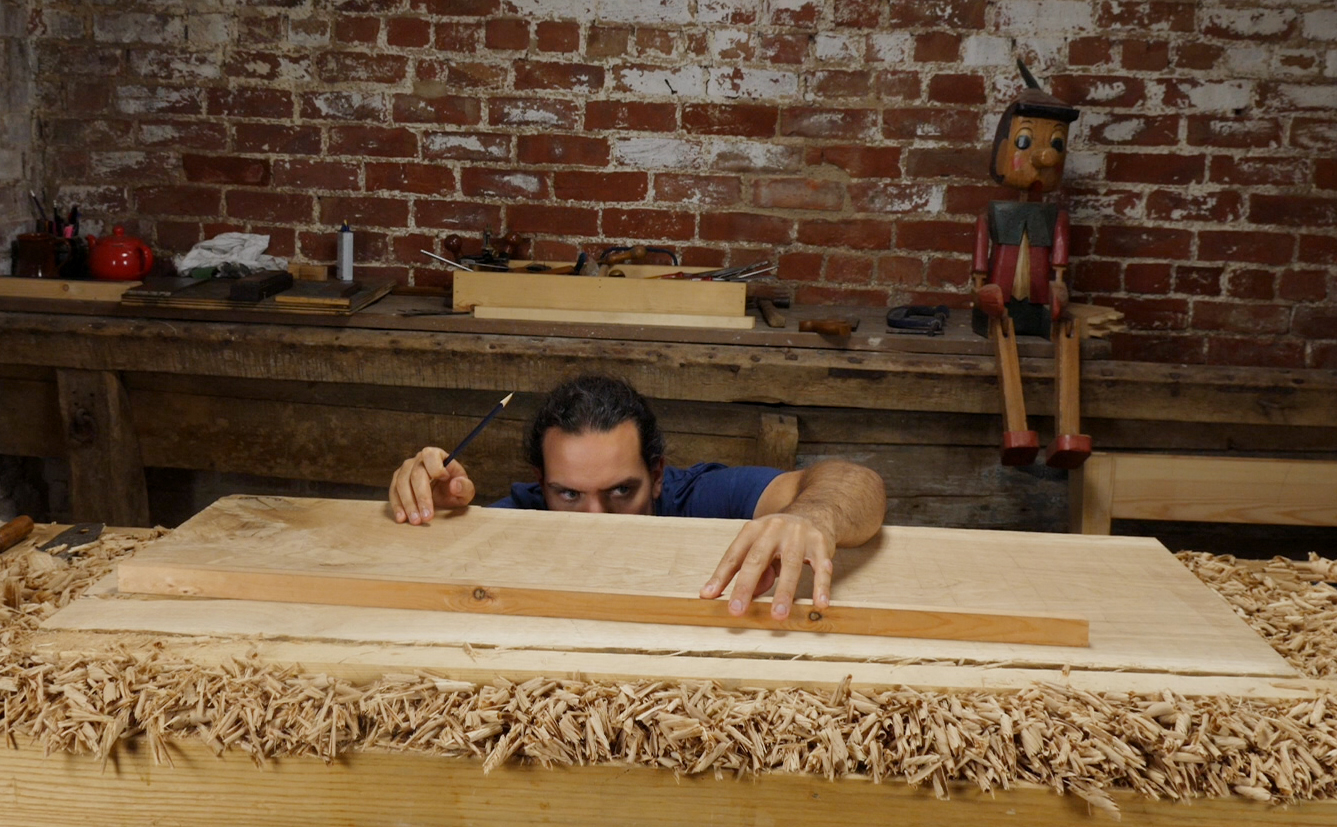
I’d had this rough old waney edged oak board sitting around for a long time, and knew it would make for an interesting top. So I started there.


Boards like this tend to get left on the shelf for any project with a fixed plan.
At first sight you think you’ve got a nice big chunk. But then you allocate for ripping off the wane, avoiding the knots and sawing round the splits, and you’re left with a couple of tiny pieces that you could have more easily have dug out of the firewood pile, and saved yourself the hassle.

Used as a top though there’s barely anything that needs to go to waste. And all of those awkward defects become ‘character’.
Now I’ve never been the biggest fan of this type of piece, but I enjoyed the challenge of watching that ugly rejected lump of wood, take on it’s own refined and unique charm.
If you’re building by hand with minimal tools like me, then it’s also a good test for your hand planing skills.
Boards like this tend to be very cupped and twisted.
That means there’s a lot of material to hog down, but you’re balancing speed against control here, as those defects are prone to tear out. If you end up ripping out a deep chunk while you plane, then you’ll be cursing, as you’ll have the whole board to bring down to that level.
So the start of this build is all about flattening that top surface. We’re using our trusty No. 5, our wangy eye, and a mix of cambers to get us there in the minimal of fuss.
You can watch the Series intro and find more details about the build here.

![Bench Top Edge Jointing [with Video]](https://www.theenglishwoodworker.com/wp-content/uploads/2022/10/bench-top-edge-jointing-video.jpg)

Hi Richard,
That looks like a low tech straight-edge. Don’t we need to spend big bucks on a precision-ground instrument of super accuracy? Can you give us some tips on what makes a good straigh-edge? Perhaps a video on how to make one sufficient for flattening a wide plank? Keep the blog posts and videos coming!
Regards,
Jacob
I’m actually interested in that as well, also making winding sticks. I think the longest surface I have that is flat is my table saw.
You can make straight edge using hand plane without any reference. Take two boards, clamp both in the vice and plane both edges. Remove one board from the vice and place planed edge on top of planed edge. Check for gap, if you have a gap in the middle, you made a hollow. Clamp both boards again and remove some wood from ends. If you have gaps at ends, then there is bump, clamp it back in the vice and fix. If there is no gap – both edges are dead straight.
Great tip
Is that the plank from Get Sharp – Chapter 1? o.O)
Haha! That Pinocchio in the background 😀 Great woodworking content by the way, enjoy reading your blog.