I don’t hate much, but I do hate a scruffy looking pegged joint.
You know, when the peg doesn’t fill the hole.
When you’ve only got the show face to get tidy, it isn’t too troublesome, particularly if you follow a few procedures. Where things start to get a bit testing though, is when both sides of the hole will be seen.
This problem is escalated further when the peg is going in to a drawborn joint.
It’s All In The Peg
Besides having a good drill bit, the most important thing is to have a well made peg, not just some shoddy bit of pre-bought dowel.
A good peg will be ever so slightly tapered. This allows it to enter easily, without damaging itself or the hole. Once it starts to get whacked in to the joint it tightens up and begins to fill the hole.
Getting that taper right is important, if you go for too much you might end up with a peg that remains so loose it’s rattling around the arse end of the joint. It could also be at risk of coming loose with time or a knock.
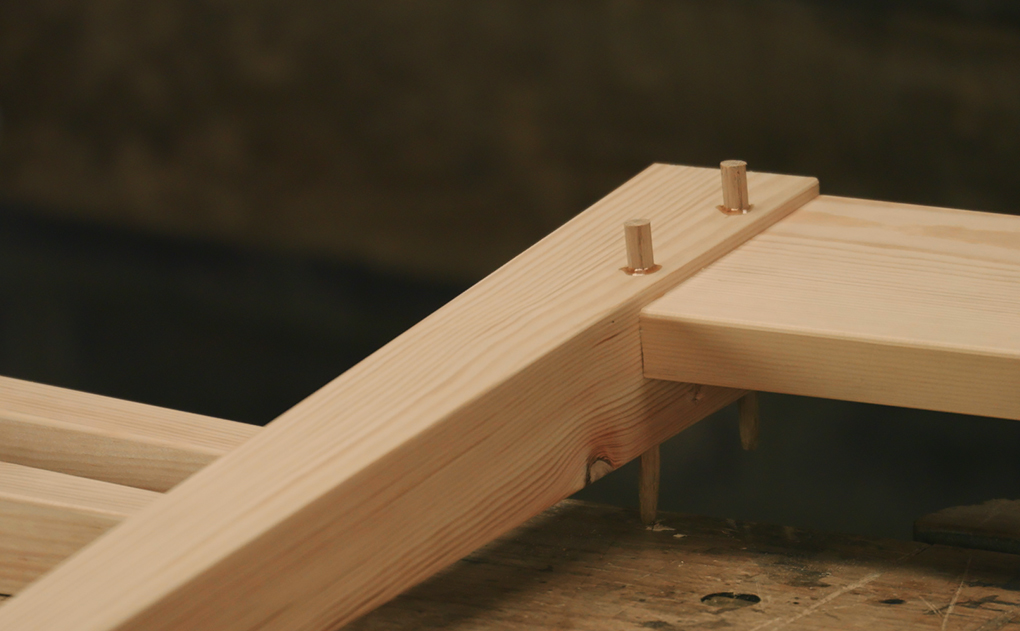
The exit face of these draw bored joints won’t be seen so the concern here is simply strength over neatness. This post explains how gaps in these mortice and tenons also add to the strength and speed of cutting the joints.
Creating a neat exit when drawboring a mortice and tenon is a particular challenge because the offset in the two holes bends the peg within the joint. It can also cause the peg to compress which makes it thinner. Of course this bending action is the whole point, but the bend and slight damage send the peg off straight and make for a particularly rough exit.
Creating Immaculate Pegged Joints
The trick to getting things neat in both scenarios (both draw boring and straight pegged joints) is in that taper. And through adding a bit of a point to the entry end of the peg.
The point on the end may seem unnecessary, but it’s incredibly effective at helping to guide things in. As a result you’re able to get away with far less taper which of course means a much better chance of a tight job on both ends of the hole.
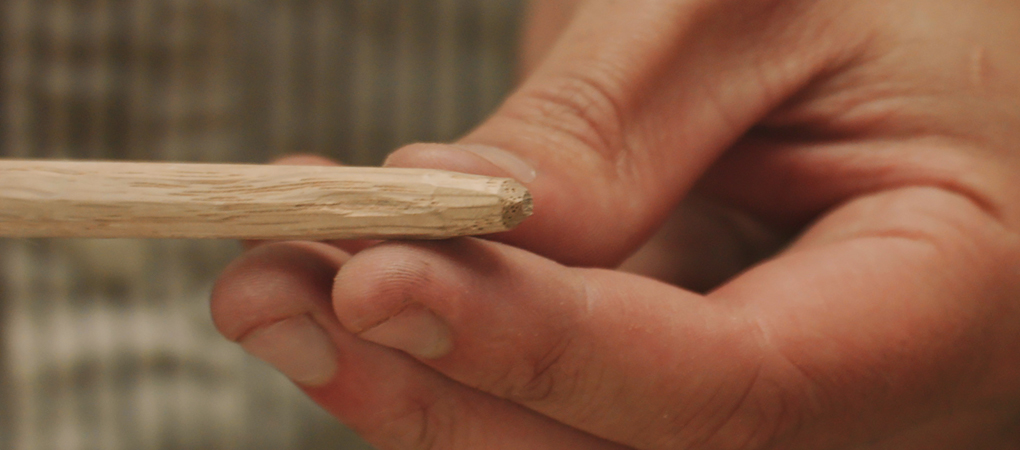
The pointed end on a tapered peg.
The perfect peg needs to be made well over length. If I was off in to inch thick stuff then I’d make the peg about 2 – 2 1/2″ long.
The entry end of the peg wants to be a nice sliding fit within the hole. At the other end you’re after a ‘not a chance’ type fit, you know, the maybe with a hammer type of tight.
If you knock this sod in, it will tighten up nicely on the show face. On the back of the joint, whilst being ever so slightly looser, it should still be visually tidy.
With our chair build the mortice and tenons were visible on both faces so neatness was critical. Getting the taper right was enough with these relatively thin components.
A Tidy Rear End
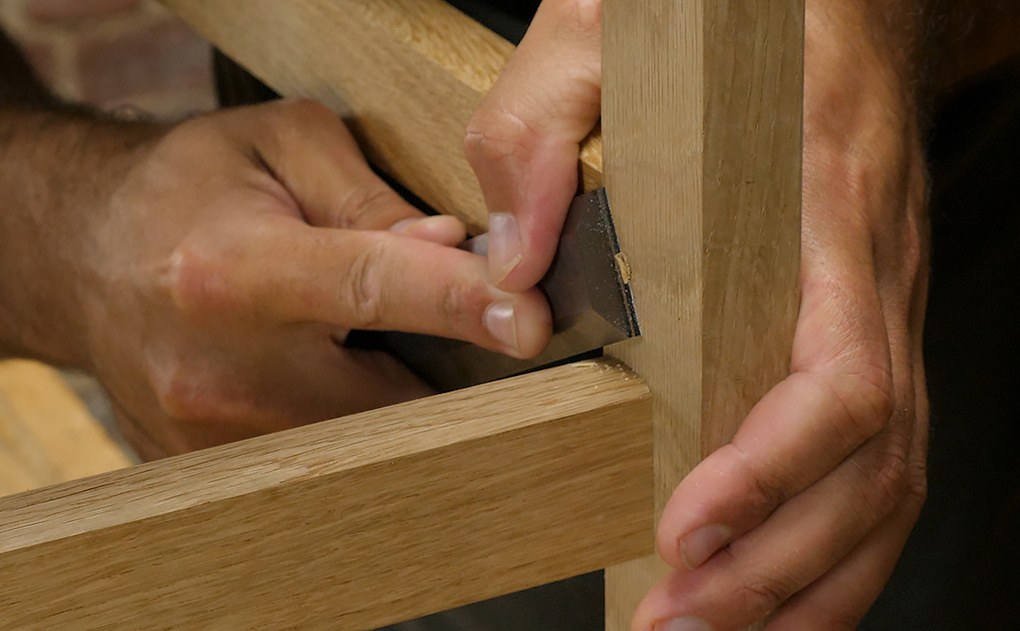
If it isn’t tidy enough on the back, and it probably isn’t if it’s a drawbored joint or if you’re going through thick stuff, then once it’s banged in, cut the peg a good 1/8″ over length. This gives enough material to batter with a hammer, preferably a peening hammer. The idea is to mushroom the peg in to any gaps making the finish a lot more presentable.
I’d avoid this hammer action on the show face unless absolutely necessary. The result is not as crisp as a peg that simply fits tight.
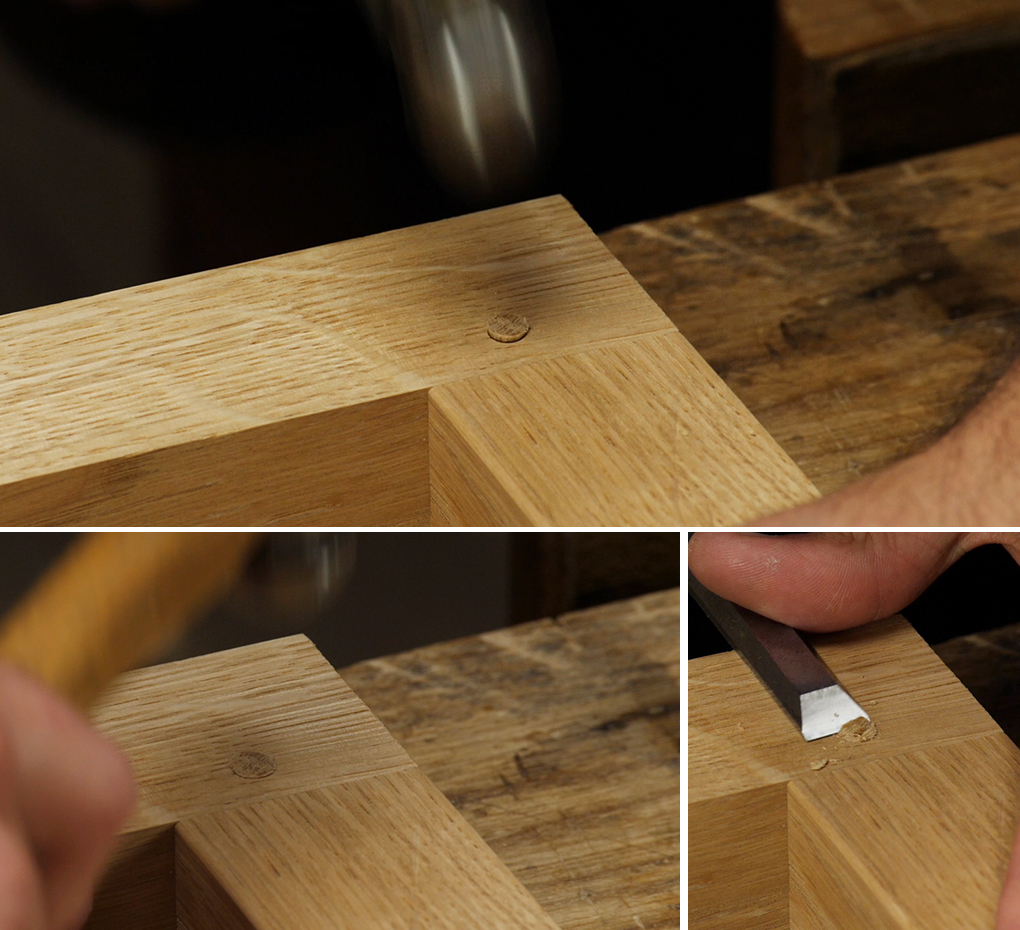
A gappy underside on a pegged mortice and tenon joint. This can be tidied up by mushrooming the peg over with a peening hammer. Flushing the peg off with a sharp chisel will then reveal a nice tidy finish.
![Pt 2: Reamers & Tenon Cutters: Use & Applications [Shop bought vs Homemade]](https://www.theenglishwoodworker.com/wp-content/uploads/2026/06/355735B8-6EB7-48E7-8135-A45EC52D5F2F-400x250.jpeg)
![Pt 1: Understanding Chair Joinery: Tapered Round Joints | [ FREE 6 Part Video Course]](https://www.theenglishwoodworker.com/wp-content/uploads/2026/06/D4FD5406-5390-49FC-B939-255EFF4F845C-400x250.jpeg)

![Bench Top Edge Jointing [with Video]](https://www.theenglishwoodworker.com/wp-content/uploads/2022/10/bench-top-edge-jointing-video.jpg)

Thank you very much for sharing your knowledge and for the “mushroom trick” !
As always, plain practical advice that’s straight forwards and to the point. Excellent.
Thanks Richard; for this and everything else you put up.
I like the mushroom trick too. A bit like a wooden rivet.
What type of wood do you recommend for the pegs?
Last weekend I was sitting in an oak-framed building about three hundred years old with dozens of visible oak pegged joints — all as scruffy as could be, but so effective and I love them, not hate them.
Danny, Sheffield
It’ll never last….
Years ago I bought, for a song, a dozen 3/8” hickory ram rods that were seconds because the grain wasn’t straight for their entire length. These have served me well over the years in my drawbore joints. I use a carpenters pencil sharpener to form the taper plus I generally will still ease the edge, where it goes back to full size, just a bit.
Your timing is impeccable. I was just yesterday contemplating how to make a peg fit tight and look respectable. My only remaining question is whether or not it matters what types of wood is used. More specifically, will using a harder/more dense wood as the peg lead to gapping and a loose fit or will that be mitigated by a tight fit and the grains running opposite directions?
I will definitely use these tips the next time. My first attempt I did not sharpen the store bought dowel enough and blew out the back. I had to deply the Resin of Shame, as I have come to call it.
I’ve done that myself on a frame-and-panel sort of window shutter I was making. When it came time to do the 2nd one, what I did was offset my taper on the peg so it didn’t catch the edge of the exit side of the board. It worked great!
Nice one .any new builds in the pipeline ..i think I am suffering with withdrawal symptoms ..and if anyone has not got the “get sharp” series its a must.. I was getting sharp before I watched ,but ,I was completely under estimating or over analysing my methods .Richard gives a honest reviews from oil to water stone and machines ..
Thanks again.
David
You have saved me from messing up so many jobs in the short time I’ve known about your existence! Best and funniest explanations on the internet. Thanks 😊
Juan
Is it possible that water could expand the peg enough to fill the outgoing hole? Has anyone tried that?